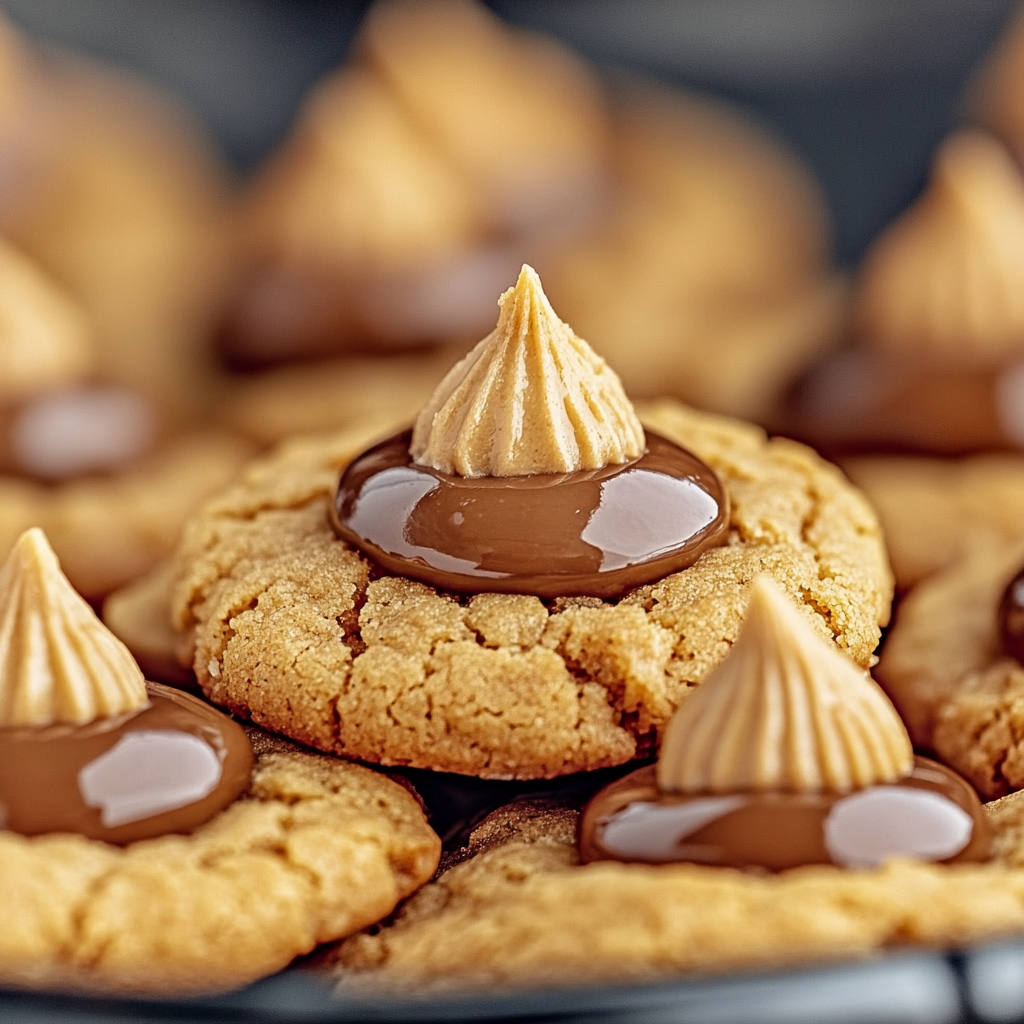
Peanut Butter Kiss Cookies are a timeless treat loved by all. With just six simple ingredients, this recipe is quick, easy, and perfect for satisfying your sweet tooth or impressing guests. Featuring a soft, peanut butter base topped with a melty chocolate kiss, these cookies are as delightful to look at as they are to eat.
Why You’ll Love This Recipe
- Requires only six ingredients, making it budget- and pantry-friendly.
- Quick to prepare, perfect for last-minute dessert needs.
- Combines the classic pairing of peanut butter and chocolate.
- Great for holiday cookie trays or everyday indulgence.
Ingredients
(Tip: You’ll find the full list of ingredients and measurements in the recipe card below.)
- Peanut butter (creamy or chunky)
- Granulated sugar
- Light brown sugar
- Egg
- Baking soda
- Hershey’s Kisses
Directions

- Preheat and Prepare: Preheat your oven to 350°F (175°C). Line a baking sheet with parchment paper or a silicone baking mat.
- Mix the Dough: In a large mixing bowl, combine peanut butter, granulated sugar, light brown sugar, egg, and baking soda. Mix until smooth and well blended.
- Shape the Cookies: Scoop about 1 tablespoon of dough and roll it into a ball. Place the dough balls onto the prepared baking sheet, spacing them about 2 inches apart.
- Bake: Bake in the preheated oven for 8-10 minutes, or until the cookies are slightly puffed and set but not overly browned.
- Add the Kisses: Remove the cookies from the oven and immediately press a Hershey’s Kiss into the center of each one. The cookie may crack slightly around the edges, which is perfectly fine.
- Cool and Serve: Allow the cookies to cool on the baking sheet for 5 minutes, then transfer them to a wire rack to cool completely.
Servings and Timing
- Servings: Approximately 24 cookies
- Prep Time: 10 minutes
- Cook Time: 10 minutes
- Total Time: 20 minutes
Variations
- Dark Chocolate: Swap the milk chocolate Kisses for dark chocolate Kisses.
- Nut-Free: Use sunflower seed butter or a similar alternative for a nut-free version.
- Mini Cookies: Make smaller cookies and use mini chocolate kisses for bite-sized treats.
- Double Chocolate: Add 1-2 tablespoons of cocoa powder to the dough for a chocolate-peanut butter combo.
- Holiday Flair: Use seasonal Hershey’s Kisses (like peppermint or caramel) for festive variations.
Storage/Reheating
- Storage: Store cookies in an airtight container at room temperature for up to 5 days.
- Freezing: Freeze baked cookies in a freezer-safe container for up to 2 months. Thaw at room temperature before serving.
- Reheating: These cookies are best served fresh. If desired, reheat in the microwave for 5-10 seconds for a warm, melty chocolate experience.
FAQs
1. Can I use natural peanut butter?
Yes, but ensure it’s well-stirred, as natural peanut butter can sometimes cause the dough to be crumbly.
2. Do I need to chill the dough?
No chilling is required for this recipe, but you can chill the dough for 15 minutes if it feels too soft to handle.
3. Can I use a sugar substitute?
Yes, substitutes like erythritol or coconut sugar can be used, but the texture and sweetness may vary slightly.
4. What can I use if I don’t have Hershey’s Kisses?
Try chocolate chips, peanut butter cups, or even a dollop of Nutella in the center.
5. Can I make this recipe gluten-free?
It’s naturally gluten-free as written, provided all your ingredients (like the baking soda) are certified gluten-free.
6. How can I prevent the cookies from spreading too much?
Ensure your baking sheet is cool before adding the dough, and avoid overmixing.
7. Can I double the recipe?
Absolutely! Simply double the ingredients to make a larger batch.
8. Are these cookies soft or crunchy?
These cookies are soft and chewy with a slightly crisp edge.
9. Can I add mix-ins to the dough?
Yes, try adding chopped peanuts, mini chocolate chips, or toffee bits for added texture and flavor.
10. How do I know when the cookies are done?
The cookies should be slightly puffed and just set. Avoid overbaking, as they will continue to firm up as they cool.
Conclusion
With just six simple ingredients and a few easy steps, these Peanut Butter Kiss Cookies are a delightful addition to any occasion. Whether for a holiday celebration, a cookie exchange, or an everyday treat, this recipe is a winner. Enjoy the perfect blend of creamy peanut butter and rich chocolate in every bite!
Print6 Ingredient Peanut Butter Kiss Cookies
These 6-Ingredient Peanut Butter Kiss Cookies are a classic treat that’s perfect for holidays, parties, or anytime you want a quick dessert. With soft peanut butter cookies topped with a melty chocolate kiss, they’re as easy to make as they are irresistible.
- Prep Time: 10 minutes
- Cook Time: 10 minutes
- Total Time: 20 minutes
- Yield: 24 cookies 1x
- Category: Dessert
- Method: Baking
- Cuisine: American
Ingredients
- 1 cup creamy peanut butter
- 1 cup granulated sugar
- 1 large egg
- 1 teaspoon vanilla extract
- 1/2 teaspoon baking soda
- 24 chocolate kisses (unwrapped)
Instructions
- Preheat your oven to 350°F (175°C) and line a baking sheet with parchment paper.
- In a large bowl, combine peanut butter, sugar, egg, vanilla extract, and baking soda. Mix until smooth and well combined.
- Roll the dough into 1-inch balls and place them on the prepared baking sheet, spacing them about 2 inches apart.
- Bake for 8–10 minutes, or until the edges are set but the centers remain soft.
- Remove from the oven and immediately press a chocolate kiss into the center of each cookie. The cookie will crack slightly, which is normal.
- Let the cookies cool on the baking sheet for 5 minutes, then transfer to a wire rack to cool completely.
Notes
- For added texture, roll the dough balls in granulated sugar before baking.
- Store cookies in an airtight container at room temperature for up to 5 days.
- Freeze unbaked cookie dough balls for up to 3 months for easy baking later.

