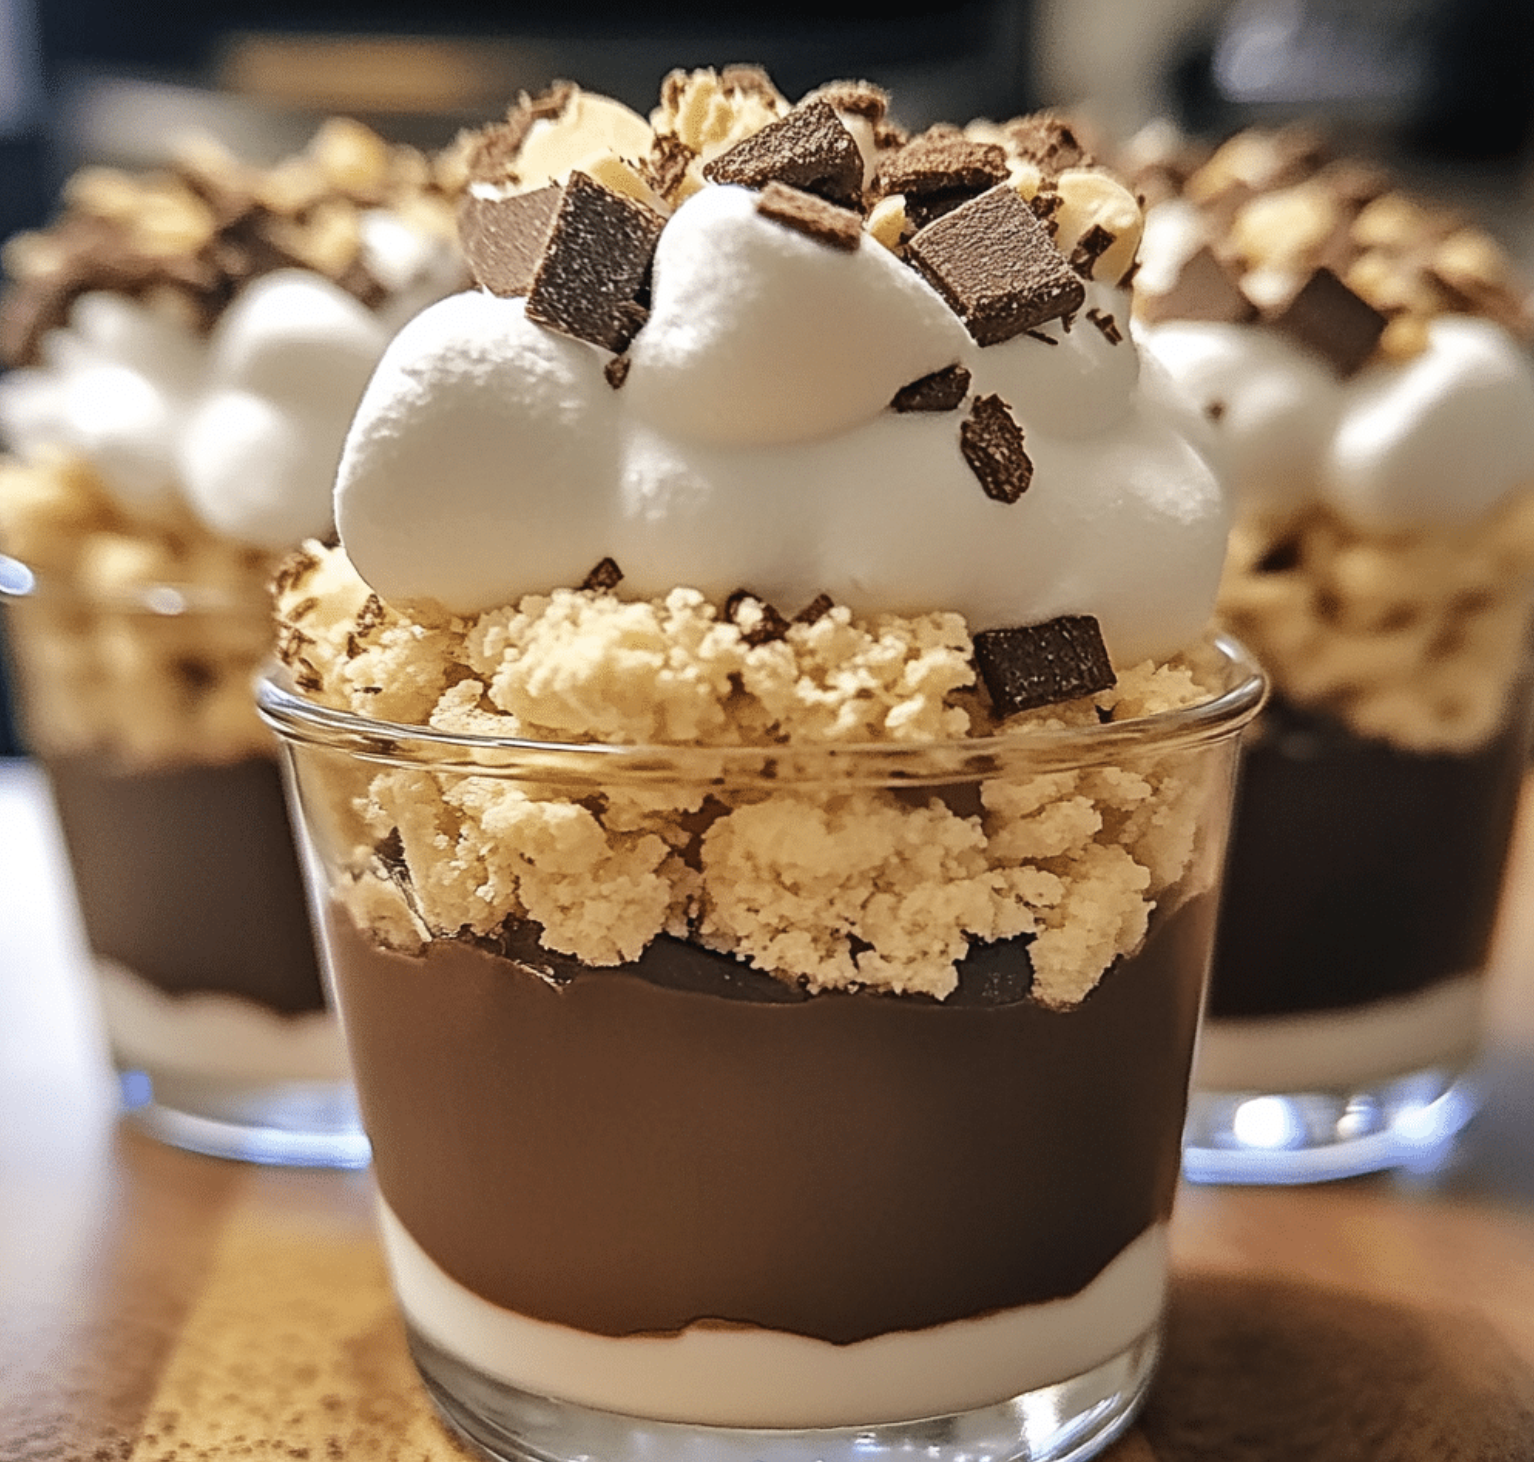
If you’re craving a delicious dessert that combines the irresistible flavors of s’mores and cheesecake, these S’mores Cheesecake Pudding Cups are the perfect treat! With layers of creamy cheesecake pudding, graham cracker crumbs, and gooey chocolate, all topped with toasted marshmallows, this easy and no-bake dessert is sure to become a favorite at your next gathering. Whether you’re hosting a summer BBQ or enjoying a cozy evening at home, these pudding cups will satisfy your sweet tooth and impress your guests.
Why You’ll Love S’mores Cheesecake Pudding Cups
S’mores and cheesecake are two classic desserts that everyone loves, and this recipe combines them into one delectable treat. Here’s why you’ll fall in love with these pudding cups:
- No-Bake Convenience: Perfect for those hot days when you don’t want to turn on the oven.
- Indulgent Layers: A mix of creamy cheesecake filling, crispy graham cracker crust, and rich chocolate.
- Easy to Make: Simple ingredients and a quick assembly make this an effortless dessert.
- Customizable: Add your favorite chocolate bar or even a drizzle of caramel to make it your own.
Ingredients You’ll Need
To make these S’mores Cheesecake Pudding Cups, you’ll need the following ingredients:
For the Cheesecake Pudding:
- 1 package of instant vanilla pudding mix
- 2 cups of cold milk
- 8 oz cream cheese, softened
- 1 cup powdered sugar
- 1 tsp vanilla extract
For the Graham Cracker Crust:
- 1 ½ cups graham cracker crumbs
- 4 tbsp melted butter
- 2 tbsp sugar
For the Toppings:
- 4 oz milk chocolate, chopped (or chocolate chips)
- Mini marshmallows (for toasting)
Instructions

1. Prepare the Graham Cracker Crust
- In a bowl, mix the graham cracker crumbs, melted butter, and sugar until fully combined.
- Spoon about a tablespoon of the crust mixture into the bottom of each serving cup (small jars, glasses, or bowls work great for this).
- Gently press down to form a crust at the bottom. Set aside.
2. Make the Cheesecake Pudding
- In a mixing bowl, beat the instant vanilla pudding mix with cold milk according to the package instructions (usually about 2 minutes of whisking).
- In another bowl, beat the softened cream cheese with powdered sugar and vanilla extract until smooth.
- Fold the pudding into the cream cheese mixture until well combined, creating a thick and creamy cheesecake-like filling.
- Spoon the cheesecake mixture over the graham cracker crust in each cup, filling them about ¾ of the way full.
3. Add the Chocolate Layer
- Sprinkle the chopped milk chocolate (or chocolate chips) on top of the cheesecake layer in each cup. You can use a generous amount to give each bite a rich, chocolaty flavor.
4. Toast the Marshmallows
- Place a few mini marshmallows on top of the chocolate layer.
- To toast the marshmallows, you can use a kitchen torch for that classic toasted look and flavor. If you don’t have a kitchen torch, you can place the cups under a broiler for 1-2 minutes, watching closely to avoid burning.
5. Chill and Serve
- Let the pudding cups chill in the fridge for at least 2 hours to allow the layers to set.
- Serve cold, and enjoy this delightful twist on the traditional s’mores!
Tips and Variations
- Make it a S’mores Bar: Set up a s’mores dessert bar with different types of chocolate and marshmallows for guests to customize their pudding cups.
- Use Dark Chocolate: If you prefer a more intense chocolate flavor, swap the milk chocolate for dark chocolate.
- Layered Presentation: For a more elegant presentation, use clear glass jars or cups, allowing the layers to be visible.
- Add More Toppings: Feel free to drizzle with caramel sauce or add chopped nuts for extra flavor and texture.
Final Thoughts
These S’mores Cheesecake Pudding Cups are a fun, easy, and indulgent dessert that brings the best of s’mores and cheesecake together in one jar. With no baking required, they’re perfect for last-minute gatherings or to enjoy as an after-dinner treat. The combination of crunchy graham crackers, creamy cheesecake, rich chocolate, and toasted marshmallows will leave everyone wanting more. So go ahead, whip up a batch, and let these decadent dessert cups take center stage at your next event!
Serving and Storage Tips for S’mores Cheesecake Pudding Cups
To ensure your S’mores Cheesecake Pudding Cups stay fresh and delicious, here are some essential serving and storage tips.
Serving Tips
- Chill Before Serving: For the best flavor and texture, let the pudding cups chill in the fridge for at least 2 hours (or up to overnight) before serving. This allows the cheesecake pudding to set properly and enhances the flavors.
- Garnish Just Before Serving: If you’re preparing the cups in advance, wait until you’re ready to serve before toasting the marshmallows. This will keep them from losing their texture and flavor in the fridge. Use a kitchen torch or broiler for the perfect golden brown marshmallow topping.
- Serve in Individual Portions: These pudding cups are perfectly portioned for individual servings. Use clear glass jars or small mason jars for an elegant touch, allowing guests to see the beautiful layers.
- Pair with Drinks: S’mores-inspired desserts go well with drinks like milk, hot chocolate, or even a sweet iced coffee. If serving at a party, consider offering a dessert cocktail such as a s’mores martini to complement the theme.
Storage Tips
- Store in an Airtight Container: To keep your pudding cups fresh, store them in an airtight container in the fridge. This will prevent the layers from absorbing odors and help the marshmallows stay soft.
- Keep the Marshmallows Separate: If you want to store the cups for more than a day, it’s best to keep the toasted marshmallows separate. Toasting marshmallows beforehand can cause them to become soggy if stored too long. You can toast them just before serving or store them in a small container and add them to each cup at the last minute.
- Keep for 2-3 Days: S’mores Cheesecake Pudding Cups can be stored in the fridge for up to 2-3 days. After this, the texture may start to degrade, and the graham cracker crust may become soft. It’s best to consume them within this time frame for the freshest taste.
- Freeze for Longer Storage: If you want to make these cups ahead of time, you can freeze the cheesecake pudding cups (without the marshmallows). Just make sure they are sealed tightly in an airtight container or wrapped in plastic wrap. When ready to serve, let them thaw in the fridge overnight and top with marshmallows just before serving.
By following these serving and storage tips, you can enjoy your S’mores Cheesecake Pudding Cups for several days while maintaining their delicious flavors and textures!
1. Can I make S’mores Cheesecake Pudding Cups ahead of time?
Yes! You can make these pudding cups ahead of time. In fact, they taste even better after chilling in the fridge for a few hours (or overnight). Prepare the cups up to the cheesecake and chocolate layers, and store them in the fridge. Just be sure to toast the marshmallows just before serving to keep them fresh and perfectly fluffy.
2. Can I use a different type of chocolate for the layers?
Absolutely! While milk chocolate is a classic choice, you can experiment with dark chocolate, white chocolate, or even flavored chocolates like caramel or peanut butter. Choose your favorite type to create a unique twist on this dessert!
3. How can I make these pudding cups without a kitchen torch?
If you don’t have a kitchen torch to toast the marshmallows, no worries! Simply place the assembled pudding cups under the broiler for 1-2 minutes, keeping a close eye on them to prevent burning. Alternatively, you can use mini marshmallows that are already toasted and add them directly to the cups for a slightly different texture.
4. How long can I store S’mores Cheesecake Pudding Cups?
S’mores Cheesecake Pudding Cups can be stored in the fridge for up to 2-3 days. If you’re planning to store them longer, it’s best to freeze the cups without the marshmallows. Add the marshmallows just before serving for the best texture and flavor.
PrintS’mores Cheesecake Pudding Cups
S’mores Cheesecake Pudding Cups are a fun, no-bake dessert that brings together creamy cheesecake, chocolate pudding, graham crackers, and marshmallows in individual cups. Perfect for parties, family gatherings, or whenever you’re craving s’mores without the campfire!
- Prep Time: 15 minutes
- Cook Time: 1 hour
- Total Time: 1 hour 15 minutes
- Yield: 6–8 servings 1x
- Category: Dessert
- Method: No-Bake
- Cuisine: American
Ingredients
1 cup graham cracker crumbs- 3 tbsp butter, melted
- 1 package (8 oz) cream cheese, softened
- 1 cup whipped topping (such as Cool Whip), thawed
- 1 cup powdered sugar
- 1 box (3.9 oz) instant chocolate pudding mix
- 2 cups cold milk
- 1 cup mini marshmallows
- ¼ cup mini chocolate chips
- 4–6 whole graham crackers (for garnish)
- Optional: toasted marshmallows or extra whipped topping for garnish
Instructions
- Prepare Graham Cracker Crust Layer: In a small bowl, mix the graham cracker crumbs and melted butter until well combined. Divide the crumb mixture evenly among 6-8 small cups or jars, pressing it lightly into the bottom.
- Make Cheesecake Layer: In a medium mixing bowl, beat the cream cheese with powdered sugar until smooth. Fold in the whipped topping until combined. Spoon or pipe this mixture evenly over the graham cracker crust in each cup.
- Make Chocolate Pudding Layer: In another bowl, whisk the chocolate pudding mix with cold milk for about 2 minutes until it thickens. Spoon or pipe the pudding on top of the cheesecake layer in each cup.
- Add Toppings: Sprinkle mini marshmallows and mini chocolate chips on top of each pudding cup. For extra garnish, break whole graham crackers into pieces and place a piece in each cup. Optionally, add a dollop of whipped topping or a toasted marshmallow on top.
- Chill and Serve: Refrigerate the cups for at least 1 hour to allow flavors to meld. Serve chilled and enjoy!
Notes
- For a toasted marshmallow topping, place mini marshmallows on a baking sheet and broil for 1-2 minutes, then add to the cups.
- These pudding cups can be made up to 1 day in advance. Keep them covered in the refrigerator until ready to serve.


