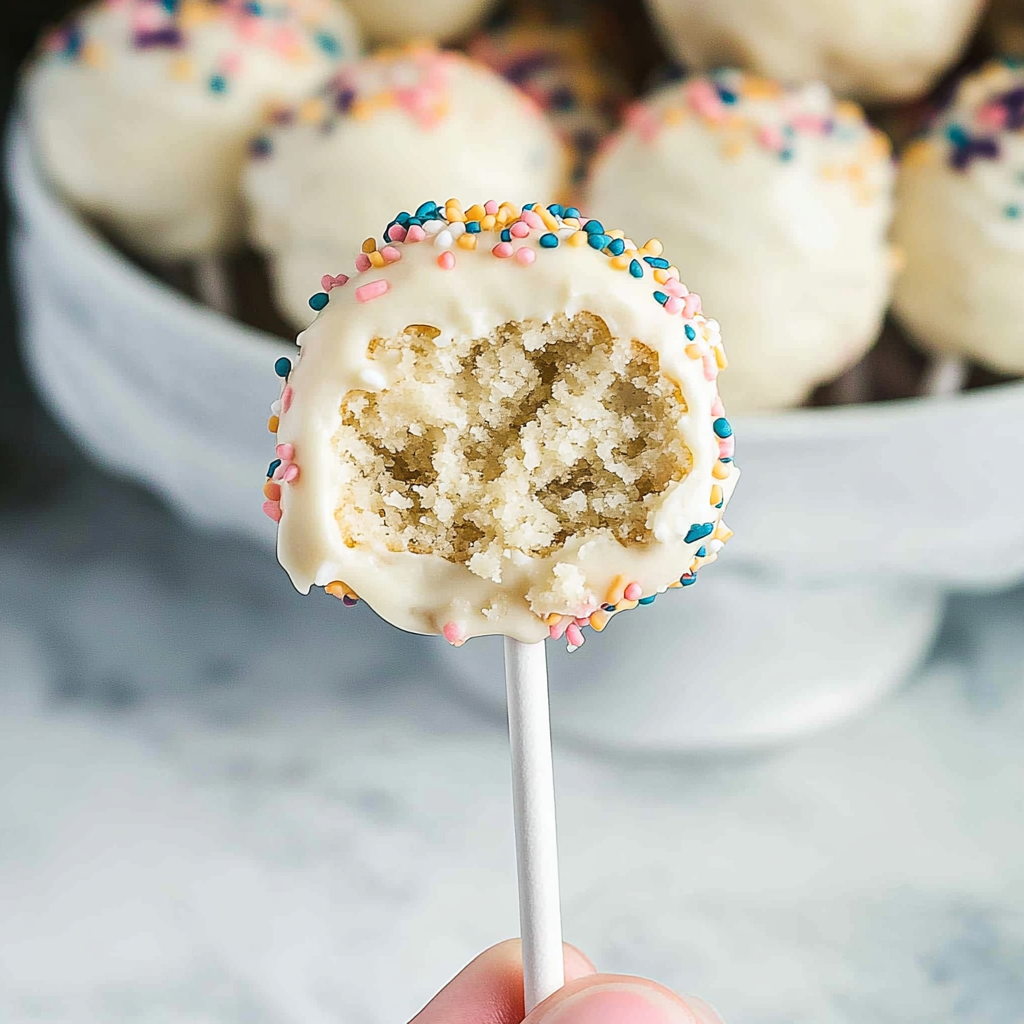
Cake pops are a delightful and fun dessert that transforms simple cake crumbs into bite-sized treats on a stick. Coated in chocolate and decorated with sprinkles or other toppings, these no-fail cake pops are perfect for parties, holidays, or just because!
Why You’ll Love This Recipe
- Super easy to make with minimal ingredients.
- Customizable with different flavors, coatings, and decorations.
- Perfect for kids’ parties, weddings, or as edible gifts.
- Great for repurposing leftover cake or cupcakes.
- Fun to make and eat, with a professional bakery-style finish.
Ingredients
(Tip: You’ll find the full list of ingredients and measurements in the recipe card below.)
- Prepared cake (any flavor, store-bought or homemade)
- Frosting (matching or complementary flavor)
- Chocolate candy melts or white chocolate for coating
- Lollipop sticks
- Sprinkles or other decorations
Directions

- Crumble the Cake:
- In a large bowl, crumble the cake into fine crumbs using your hands or a fork.
- Mix with Frosting:
- Add 2-4 tablespoons of frosting to the crumbs and mix until the mixture holds together when pressed. Start with less frosting and add more as needed to achieve a moldable consistency.
- Shape the Cake Balls:
- Scoop about 1 tablespoon of the mixture and roll it into a smooth ball using your hands. Place the balls on a baking sheet lined with parchment paper.
- Insert the Sticks:
- Melt a small amount of candy melts or chocolate. Dip the tip of a lollipop stick into the melted chocolate and insert it halfway into a cake ball. Repeat with the remaining balls. This helps secure the sticks.
- Chill the Cake Pops:
- Place the cake pops in the refrigerator for at least 1 hour, or in the freezer for 15-20 minutes, until firm.
- Coat the Cake Pops:
- Melt the candy melts or chocolate in a microwave-safe bowl in 20-second intervals, stirring between each, until smooth.
- Dip each cake pop into the melted chocolate, gently tapping off the excess.
- Decorate:
- Immediately add sprinkles or decorations while the coating is still wet. Stand the cake pops upright in a foam block or a stand to let the coating set.
- Serve and Enjoy:
- Once the coating is firm, the cake pops are ready to serve.
Servings and Timing
- Servings: Makes about 20-25 cake pops.
- Prep Time: 30 minutes.
- Chill Time: 1 hour.
- Total Time: 1 hour 30 minutes.
Variations
- Funfetti Cake Pops: Use funfetti cake and vanilla frosting for a colorful treat.
- Chocolate Lovers: Combine chocolate cake with chocolate frosting and dip in dark chocolate.
- Red Velvet: Mix red velvet cake with cream cheese frosting and coat with white chocolate.
- Nutty Flavor: Add chopped nuts or crushed cookies to the coating.
- Themed Decorations: Use food coloring in white chocolate and sprinkles to match party themes.
Storage/Reheating
- Storage: Store cake pops in an airtight container at room temperature for up to 3 days, or in the refrigerator for up to 1 week.
- Freezing: Freeze uncoated cake balls for up to 3 months. Thaw and coat before serving.
- Reheating Coating: If the chocolate thickens while dipping, reheat it in short intervals in the microwave.
FAQs
Can I use store-bought cake?
Yes, store-bought cake works perfectly and saves time.
How do I prevent cracks in the coating?
Ensure the cake balls and melted chocolate are at similar temperatures when dipping.
Can I skip the sticks?
Yes, you can make cake balls without sticks for a simpler version.
How do I make the coating smoother?
Add 1 teaspoon of vegetable oil or shortening to the melted chocolate for a thinner consistency.
Can I use homemade frosting?
Absolutely! Just ensure it’s not too runny.
What if the cake balls fall off the sticks?
Make sure the balls are firm from chilling and secure the sticks with melted chocolate before dipping.
Can I make mini cake pops?
Yes, use a smaller scoop to roll smaller balls for bite-sized treats.
What can I use instead of candy melts?
White or dark chocolate chips work well; just add a bit of oil to thin the consistency.
How do I display the cake pops?
Use a foam block, cake pop stand, or a jar filled with rice to hold the pops upright.
Are cake pops gluten-free?
Use a gluten-free cake mix and frosting for a gluten-free version.
Conclusion
Cake pops are a versatile, easy-to-make dessert that’s as fun to create as it is to eat. Whether for a special occasion or just a sweet treat, this recipe is a go-to for perfectly portioned desserts. Try these cake pops and enjoy a delightful, bite-sized treat that everyone will love!
PrintEasy Cake Pop Recipe
These easy cake pops are a fun, bite-sized treat perfect for parties, holidays, or a quick dessert fix. Made with crumbled cake and frosting, then coated in a smooth chocolate shell, they’re as delicious as they are adorable. Customize with your favorite decorations to match any theme!
- Prep Time: 45 minutes
- Cook Time: 30 minutes
- Total Time: 1 hour 15 minutes
- Yield: 20–24 cake pops 1x
- Category: Dessert
- Method: No-Bake
- Cuisine: American
Ingredients
- 1 box cake mix (any flavor) + ingredients needed to bake it (eggs, oil, water)
- ½ cup frosting (store-bought or homemade)
- 2 cups chocolate or candy melts (any color)
- Sprinkles or decorations (optional)
- Cake pop sticks
Instructions
- Bake the cake:
- Prepare and bake the cake according to the instructions on the box. Allow it to cool completely.
- Crumble the cake:
- Crumble the cooled cake into a large bowl, breaking it into fine crumbs.
- Mix with frosting:
- Add frosting to the cake crumbs, starting with ¼ cup and adding more as needed. Mix until the mixture holds together when pressed but is not overly sticky.
- Shape the cake pops:
- Scoop out small portions of the mixture (about 1 tablespoon each) and roll them into balls. Place the balls on a parchment-lined baking sheet. Refrigerate for at least 30 minutes or freeze for 15 minutes to firm up.
- Prepare the coating:
- Melt the chocolate or candy melts according to package instructions. If the coating is too thick, add a teaspoon of vegetable oil to thin it out.
- Assemble the cake pops:
- Dip the end of each cake pop stick into the melted chocolate, then insert it halfway into a chilled cake ball. This helps secure the stick in place. Allow the chocolate to set for a few minutes.
- Coat the cake pops:
- Dip each cake pop into the melted chocolate, ensuring it is fully coated. Gently tap off excess chocolate and immediately add sprinkles or decorations if desired.
- Set the cake pops:
- Place the coated cake pops upright in a stand (or a block of Styrofoam) to dry completely.
Notes
- You can use different flavors of cake and frosting for variety.
- For extra stability, chill the cake pops again after coating them.
- Store the finished cake pops in an airtight container in the fridge for up to 5 days.

