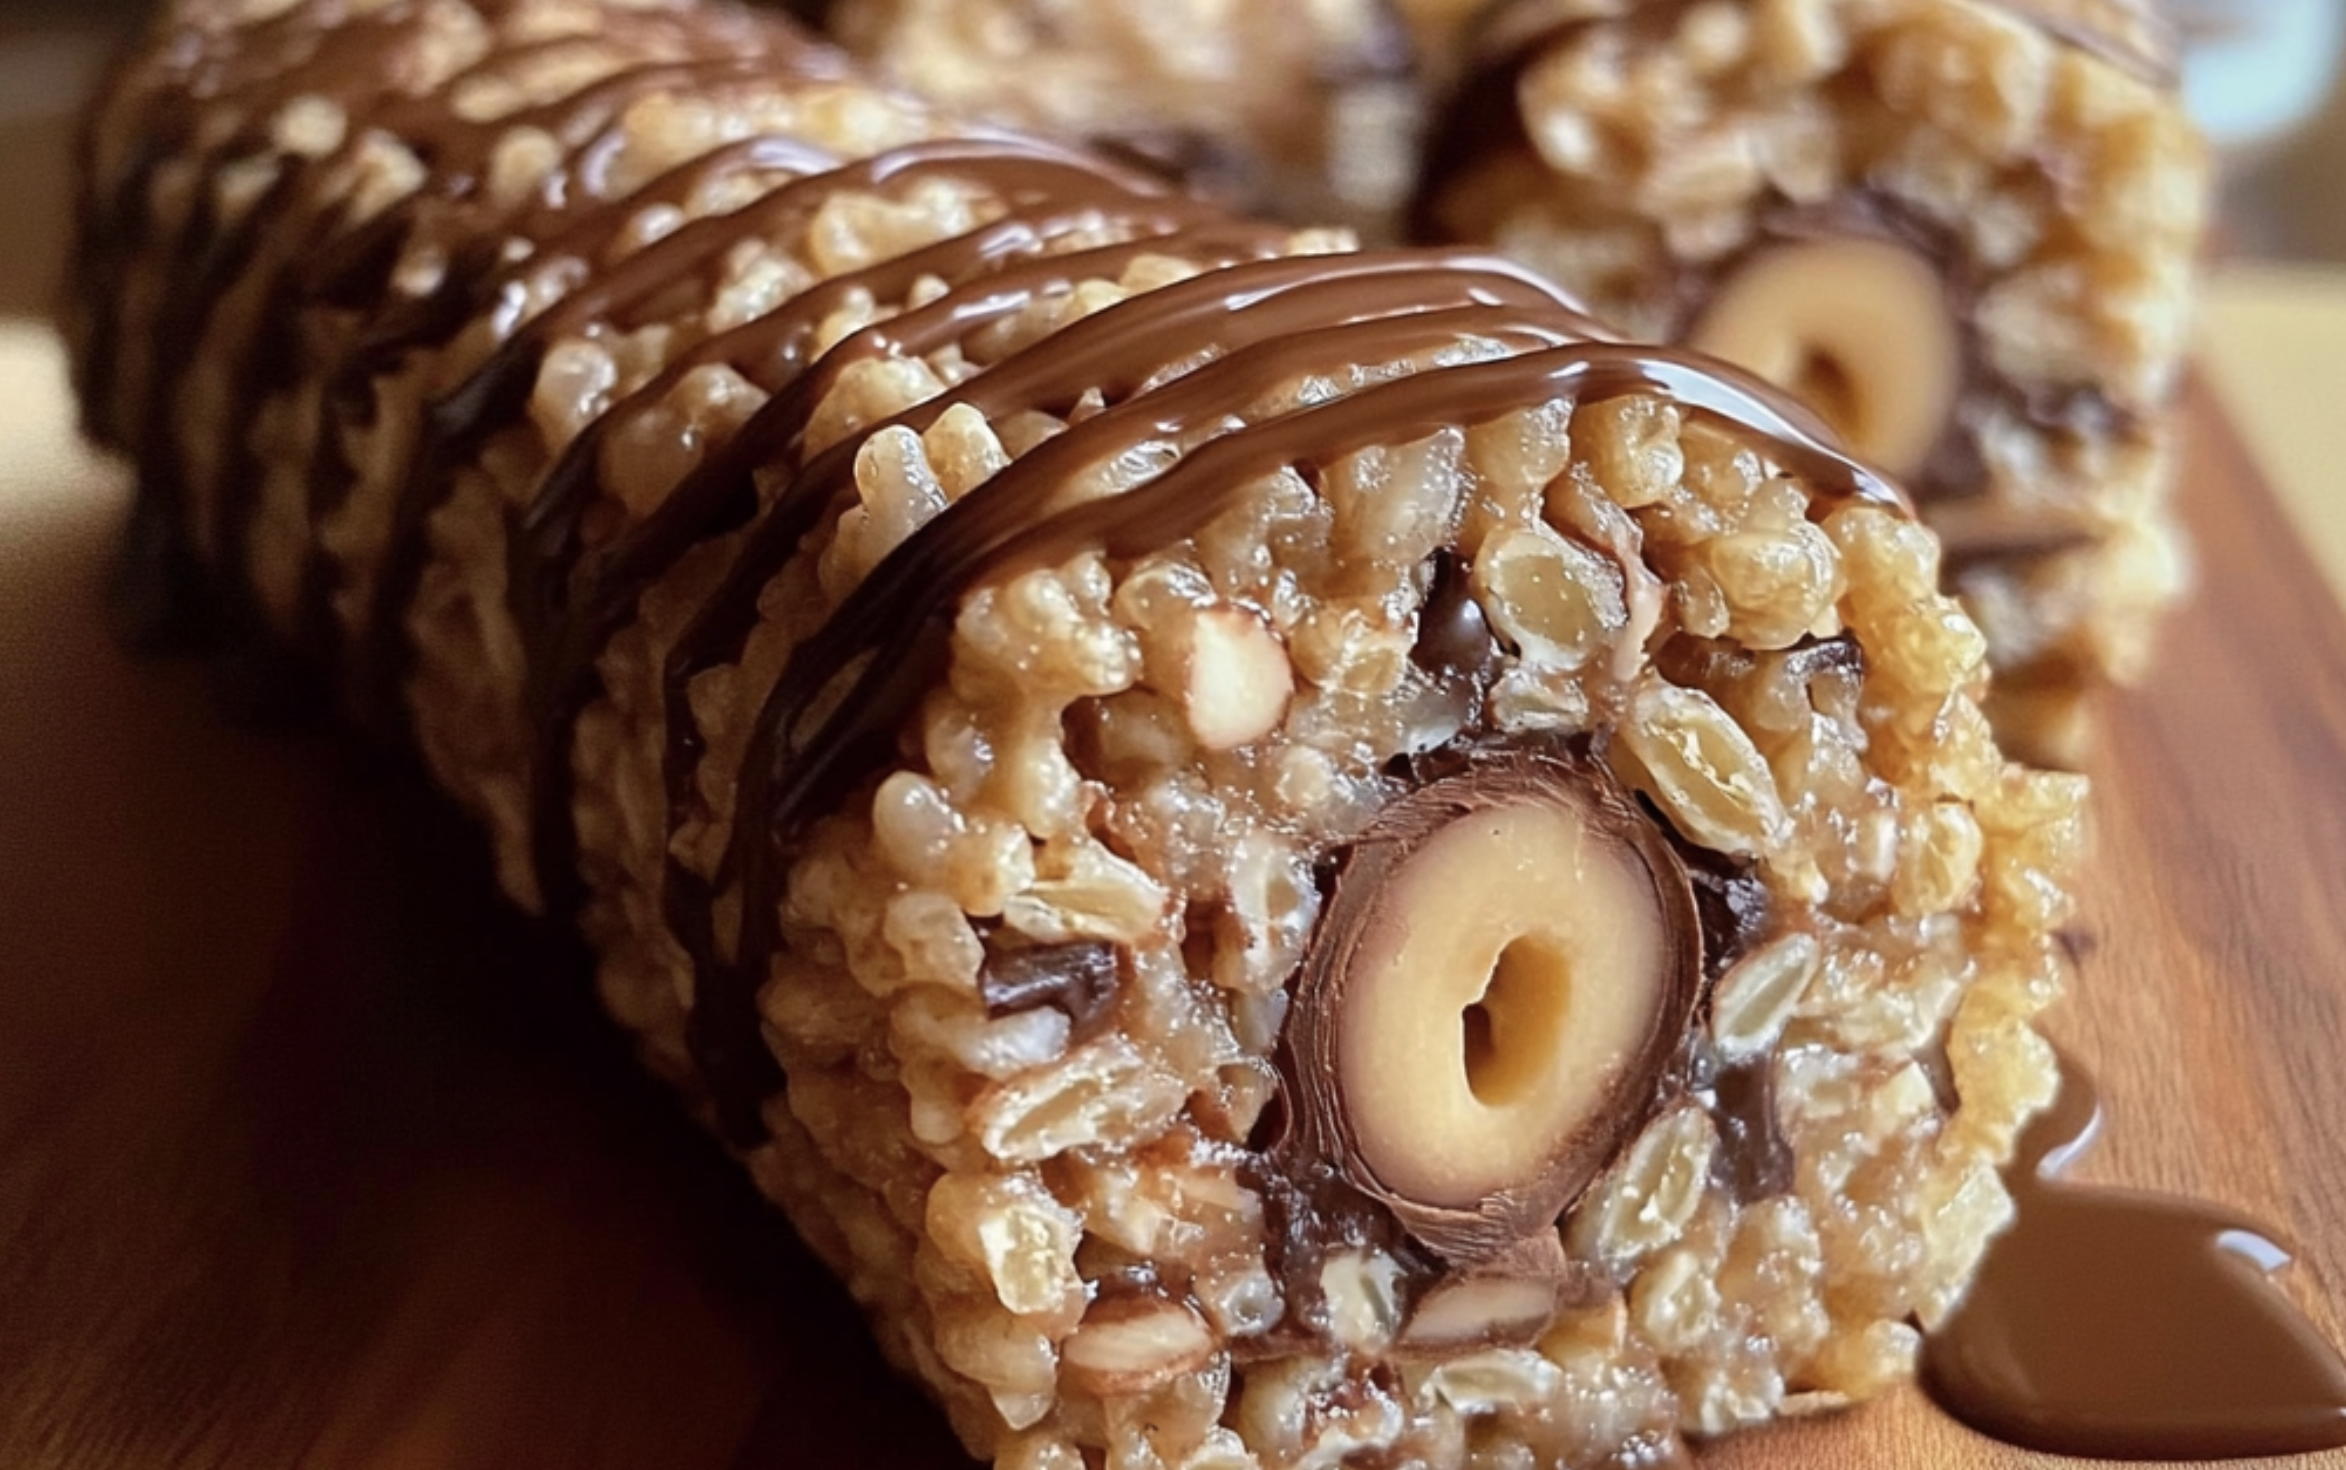
Looking for a dessert that combines the gooey sweetness of marshmallows, the crunch of rice cereal, the creaminess of peanut butter, and the indulgence of chocolate? The Chocolate Peanut Butter Rice Krispies Roll is your answer! Perfect for parties, family gatherings, or a delightful snack, this no-bake treat is as fun to make as it is to eat.
Why You’ll Love This Recipe
- Quick and Easy: No baking required, ready in under 30 minutes.
- Crowd-Pleaser: Combines universally loved flavors – chocolate and peanut butter.
- Customizable: Easily adaptable to dietary preferences or ingredient availability.
Ingredients You’ll Need
To prepare this delightful roll, gather these ingredients:
- 3 cups of Rice Krispies cereal
- 3 tablespoons of unsalted butter
- 10 ounces of marshmallows (about 40 standard-sized)
- 1/2 cup of creamy peanut butter
- 1 cup of semi-sweet chocolate chips
- 1 tablespoon of coconut oil or shortening (optional, for a smoother chocolate layer)
Step-by-Step Instructions

1. Prepare the Base
- In a large saucepan, melt the butter over low heat.
- Add marshmallows and stir continuously until melted and smooth.
- Remove from heat and quickly mix in the Rice Krispies cereal until fully coated.
2. Assemble the Roll
- Spread the cereal mixture onto a greased or parchment-lined baking sheet. Press into a thin, even rectangle using a greased spatula or your hands.
3. Add the Peanut Butter Layer
- Spread the peanut butter evenly over the Rice Krispies base while it’s still warm.
4. Create the Chocolate Topping
- Melt the chocolate chips in a microwave-safe bowl in 20-second intervals, stirring in between, until smooth.
- Add coconut oil or shortening if desired for a glossy finish.
- Spread the melted chocolate over the peanut butter layer.
5. Roll and Chill
- Gently roll the layered mixture into a log shape, starting from one of the shorter ends. Use parchment paper to help with the rolling process.
- Wrap the roll tightly in the parchment paper and refrigerate for 1-2 hours or until firm.
6. Slice and Serve
- Once chilled, slice the roll into 1-inch thick pieces.
- Serve and watch it disappear!
Pro Tips for the Perfect Roll
- Work Quickly: The marshmallow mixture can harden fast, so assemble the layers without delay.
- Use Fresh Ingredients: Fresh marshmallows and cereal ensure the best texture and flavor.
- Customize: Add a sprinkle of sea salt or drizzle white chocolate for an extra touch of flavor.
Variations to Try
- Nut-Free Option: Replace peanut butter with sunflower seed butter or cookie butter.
- Add Crunch: Sprinkle chopped nuts or crushed pretzels over the peanut butter layer.
- Festive Flair: Add colored sprinkles to the chocolate layer for holidays or themed events.
Why This Recipe is Perfect for SEO
Chocolate Peanut Butter Rice Krispies Roll is a highly searched recipe because it combines trending keywords like “no-bake,” “chocolate,” and “peanut butter.” Adding variations and tips enhances user engagement, and the ease of preparation makes it shareable. Optimize your content by including images, videos, or FAQs to further attract and retain readers.
Serving and Storage Tips for Chocolate Peanut Butter Rice Krispies Roll
Serving Suggestions
- Perfect Slices: Use a sharp knife and clean it between slices for a neat presentation.
- Platter Presentation: Arrange the rolls on a decorative serving platter lined with parchment or wax paper for easy cleanup.
- Pair It Up: Serve alongside a glass of cold milk, a hot cup of coffee, or a scoop of vanilla ice cream for an extra treat.
- Party-Ready: Add toothpicks to each slice for a fun, grab-and-go option at parties or gatherings.
Storage Tips
- Refrigerator: Store slices in an airtight container, separating layers with parchment or wax paper to prevent sticking. They’ll stay fresh for up to 1 week.
- Freezer: Place the slices in a freezer-safe container or bag, again separating layers with parchment. Freeze for up to 2 months. Thaw in the refrigerator for about an hour before serving.
- Room Temperature (Short-Term): If you’re serving the rolls the same day, they can be kept at room temperature for 4-6 hours, provided the environment isn’t too warm to melt the chocolate.
Extra Tips for Longevity
- Avoid Humidity: High humidity can affect the texture of the Rice Krispies layer, making it less crispy.
- Chocolate Protection: If storing at room temperature, place slices in a cool, dry place away from direct sunlight to prevent the chocolate from melting.
- Keep Airtight: Ensure containers are sealed tightly to maintain freshness and prevent the rolls from drying out.
Whether you’re preparing ahead for a party or saving leftovers for later, these tips will keep your Chocolate Peanut Butter Rice Krispies Roll as delicious as the day you made them!
1. Can I use chunky peanut butter instead of creamy?
Yes! Chunky peanut butter adds a delightful crunch to the roll, complementing the texture of the Rice Krispies. If you prefer a smoother texture, stick to creamy peanut butter.
2. What can I use instead of Rice Krispies cereal?
If you don’t have Rice Krispies, you can substitute with puffed rice or similar crispy cereals. Avoid using dense cereals as they may alter the texture and flavor of the roll.
3. How do I prevent the roll from cracking when I slice it?
Ensure the roll is firm but not overly hard when slicing. Use a sharp knife and make smooth, confident cuts. Warming the knife slightly (by dipping it in hot water and drying it) can also help make clean slices.
4. Can I make this recipe gluten-free?
Yes! Use a certified gluten-free crispy rice cereal and check that your marshmallows, peanut butter, and chocolate chips are also gluten-free to accommodate dietary needs.
PrintChocolate Peanut Butter Rice Krispies Roll
This no-bake dessert combines the crunch of Rice Krispies with the rich flavors of chocolate and peanut butter, rolled into an irresistible spiral. Perfect for parties, holidays, or as a quick treat!
- Prep Time: 15 minutes
- Cook Time: 1 hour
- Total Time: 1 hour 15 minutes
- Yield: 10–12 slices 1x
- Category: Dessert, Snack
- Method: No-Bake
- Cuisine: American
Ingredients
- 3 cups (90 g) Rice Krispies cereal
- 1/2 cup (120 g) creamy peanut butter
- 1/4 cup (60 g) unsalted butter
- 1/2 cup (100 g) granulated sugar
- 1/4 cup (60 ml) light corn syrup or honey
For the chocolate layer:
- 1 cup (175 g) semi-sweet chocolate chips
- 2 tablespoons (30 g) unsalted butter
Instructions
- Prepare the peanut butter layer:
- In a medium saucepan over medium heat, combine the peanut butter, butter, sugar, and corn syrup (or honey). Stir until melted and smooth.
- Remove from heat and stir in the Rice Krispies until evenly coated.
- Spread the mixture:
- Place a sheet of parchment paper or wax paper on a flat surface. Press the Rice Krispies mixture evenly into a rectangle, approximately 12×8 inches. Use a rolling pin or your hands to smooth it out.
- Make the chocolate layer:
- In a microwave-safe bowl, melt the chocolate chips and butter in 30-second intervals, stirring until smooth and glossy.
- Assemble the roll:
- Spread the melted chocolate evenly over the Rice Krispies rectangle. Let it sit for 5 minutes to cool slightly but still remain pliable.
- Roll the dessert:
- Starting from the shorter side, carefully roll the rectangle into a tight log using the parchment paper to help lift and guide the roll. Place the roll seam-side down on the parchment.
- Chill and slice:
- Wrap the roll in the parchment paper and refrigerate for at least 1 hour, or until firm. Once chilled, slice into 1/2-inch rounds and serve.
Notes
- Add mini marshmallows or chopped nuts to the Rice Krispies layer for extra texture.
- For a festive touch, sprinkle the chocolate layer with colorful sprinkles before rolling.
- Store in an airtight container in the refrigerator for up to 1 week.


