
Fruit Granola Bars are a wholesome, chewy snack made with oats, dried fruit, and natural sweeteners. These bars are easy to make, endlessly customizable, and perfect for on-the-go breakfasts, lunchboxes, or afternoon energy boosts. Packed with fiber, flavor, and just the right amount of sweetness, they’re a better-for-you alternative to store-bought granola bars.
Why You’ll Love This Recipe
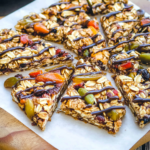
These granola bars are soft, chewy, and naturally sweetened, with the perfect balance of textures from oats, fruit, and optional add-ins like nuts or seeds. They’re quick to prepare, freezer-friendly, and easy to grab for a healthy snack any time of day. You can mix and match your favorite dried fruits and customize the recipe to fit dietary preferences or what you have on hand.
ingredients
(Tip: You’ll find the full list of ingredients and measurements in the recipe card below.)
- Rolled oats
- Nut or seed butter (peanut butter, almond butter, sunflower seed butter)
- Honey or maple syrup
- Dried fruit (raisins, cranberries, chopped dates, apricots, or a mix)
- Chia seeds or flaxseeds (optional)
- Vanilla extract
- Cinnamon
- Salt
- Mini chocolate chips, shredded coconut, or chopped nuts (optional)
directions

- Line an 8×8-inch baking dish with parchment paper.
- In a large bowl, mix the oats, dried fruit, seeds, cinnamon, and salt.
- In a small saucepan over low heat, warm the nut butter and honey or maple syrup until smooth and well combined.
- Remove from heat and stir in the vanilla extract.
- Pour the warm mixture over the dry ingredients and stir until evenly coated.
- Transfer the mixture to the prepared pan and press firmly into an even layer. Use a spatula or the back of a spoon to compact it well.
- Chill in the refrigerator for at least 1 hour to set.
- Once firm, lift out of the pan and slice into bars. Store and enjoy.
Servings and timing
This recipe makes about 10–12 bars and takes around 10 minutes to prepare, plus at least 1 hour to chill and set.
Variations
- Nut-free: Use sunflower seed butter and omit any nut toppings.
- High-protein: Add a scoop of protein powder or use protein-rich nut butter.
- Tropical twist: Use dried pineapple, mango, and coconut flakes.
- Chocolate lovers: Add mini chocolate chips or a drizzle of melted dark chocolate.
- Spiced version: Add nutmeg, ginger, or cardamom for extra warmth.
storage/reheating
Store bars in an airtight container in the refrigerator for up to 1 week. For longer storage, freeze bars individually wrapped for up to 2 months. No reheating is needed—just thaw frozen bars at room temperature for a few minutes before eating.
FAQs
Can I use quick oats instead of rolled oats?
Yes, but rolled oats give a better chewy texture. Quick oats will make the bars a bit softer.
What kind of dried fruit works best?
Raisins, cranberries, chopped apricots, dates, cherries, or a fruit mix all work great.
How do I make these bars stick together better?
Make sure to warm and fully mix the wet ingredients before combining with the dry, and press the mixture very firmly into the pan before chilling.
Can I make them vegan?
Yes! Use maple syrup instead of honey and ensure your chocolate chips (if using) are dairy-free.
Are these bars gluten-free?
They can be if you use certified gluten-free oats and check all other ingredient labels.
Can I bake these granola bars?
This recipe is no-bake, but you can bake them at 325°F (160°C) for 15–20 minutes for a firmer texture.
Can I reduce the sugar?
You can use less honey or maple syrup, but the bars may be more crumbly. Add a mashed banana for moisture and natural sweetness.
What’s the best way to pack these for lunches?
Wrap individual bars in parchment paper or place in snack-size containers for easy grab-and-go packing.
Can I double the recipe?
Absolutely. Use a 9×13-inch pan if doubling and increase the chill time slightly.
Do these travel well?
Yes! They hold up great at room temperature for several hours—perfect for road trips or hikes.
Conclusion
Fruit Granola Bars are a tasty, nutritious snack that you can feel good about eating and sharing. Whether you’re making them for school lunches, afternoon pick-me-ups, or just to keep healthy snacks on hand, these bars are a reliable favorite. Simple, customizable, and delicious, they’re sure to become a staple in your kitchen.
PrintFruit Granola Bars
These Fruit Granola Bars are soft, chewy, and naturally sweetened with honey and dried fruit. Packed with oats, nut butter, and your favorite mix-ins, they’re easy to make and perfect for meal prep. Great for kids and adults alike – no baking required!
- Prep Time: 10 minutes
- Cook Time: 1 hour
- Total Time: 1 hour 10 minutes
- Yield: 10 bars 1x
- Category: Dessert, Snack
- Method: No-Bake
- Cuisine: American
Ingredients
-
2 cups old-fashioned rolled oats
-
1 cup mixed dried fruit (like cranberries, raisins, apricots, cherries, or dates), chopped
-
½ cup chopped nuts (almonds, walnuts, or cashews)
-
¼ cup seeds (pumpkin or sunflower seeds)
-
½ teaspoon cinnamon
-
Pinch of salt
-
½ cup nut butter (peanut, almond, or cashew)
-
⅓ cup honey or maple syrup
-
1 teaspoon vanilla extract
Instructions
-
Line an 8×8-inch pan with parchment paper.
-
In a large bowl, mix oats, dried fruit, nuts, seeds, cinnamon, and salt.
-
In a small saucepan over low heat, warm the nut butter and honey until smooth and melted. Remove from heat and stir in vanilla.
-
Pour the wet mixture over the dry ingredients and stir until everything is well coated.
-
Press the mixture firmly into the prepared pan using a spatula or your hands.
-
Chill in the fridge for at least 1 hour to set.
-
Once firm, lift out and slice into bars. Store in the fridge for up to a week or freeze for longer.
Notes
-
Use gluten-free oats for a gluten-free option.
-
Add chocolate chips, coconut flakes, or a sprinkle of chia seeds if desired.
-
Make them vegan by using maple syrup instead of honey.