
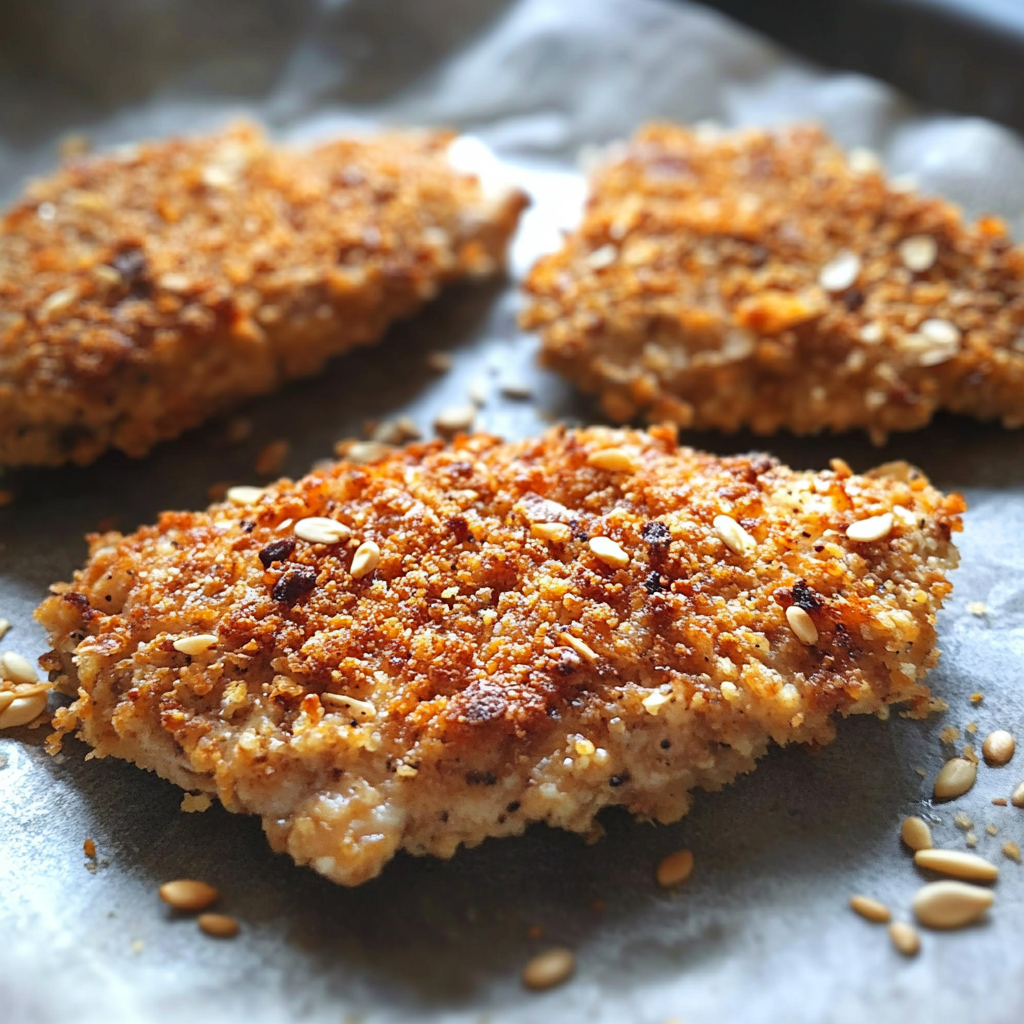
Baked Chicken Cutlets are a healthier alternative to the traditional fried version, offering the same crispy texture and juicy interior without the extra oil. Coated in seasoned breadcrumbs and baked to golden perfection, these cutlets are simple, delicious, and incredibly versatile. Ideal for weeknight dinners, meal prep, or serving with your favorite sides.
Why You’ll Love This Recipe
This recipe keeps things light without sacrificing flavor or crunch. It’s oven-baked instead of fried, making it lower in fat and calories but still packed with that crave-worthy crispy coating. Plus, it’s quick to prepare, easy to customize with different seasonings, and pairs well with just about anything from pasta to salad.
ingredients
(Tip: You’ll find the full list of ingredients and measurements in the recipe card below.)
- Boneless, skinless chicken breasts
- Eggs
- Breadcrumbs (plain or seasoned)
- Parmesan cheese
- Garlic powder
- Onion powder
- Paprika
- Salt and pepper
- Olive oil or cooking spray
- Fresh parsley or lemon wedges for garnish (optional)
directions
- Preheat your oven to 400°F (200°C). Line a baking sheet with parchment paper or lightly grease it.
- Pound the chicken breasts to even thickness, about 1/2 inch thick.
- In one bowl, beat the eggs. In another bowl, combine breadcrumbs, Parmesan, garlic powder, onion powder, paprika, salt, and pepper.
- Dip each chicken cutlet into the egg, then coat with the breadcrumb mixture, pressing gently to adhere.
- Place the coated cutlets on the prepared baking sheet. Lightly drizzle with olive oil or spray with cooking spray for extra crispiness.
- Bake for 20–25 minutes, flipping halfway through, until the chicken is golden brown and cooked through (internal temperature should reach 165°F/74°C).
- Let rest for 5 minutes before serving. Garnish with chopped parsley or lemon wedges if desired.
Servings and timing
This recipe makes 4 servings.
Prep time: 15 minutes
Cook time: 25 minutes
Total time: 40 minutes
Variations
- Use panko breadcrumbs for an even crunchier coating.
- Add Italian herbs or cayenne pepper to the breadcrumb mix for added flavor.
- Swap Parmesan with grated Romano or Asiago cheese.
- Use chicken thighs for a juicier option.
- Make it gluten-free by using gluten-free breadcrumbs.
storage/reheating
Store leftovers in an airtight container in the refrigerator for up to 4 days.
To reheat, bake in a 350°F oven for 10–12 minutes or until heated through. You can also reheat in an air fryer for extra crispiness. Avoid microwaving as it may make the coating soggy.
FAQs
Can I prepare the chicken cutlets in advance?
Yes, you can bread the cutlets and store them in the fridge for up to 1 day before baking.
Can I freeze baked chicken cutlets?
Absolutely. Let them cool completely, then freeze in a single layer before transferring to a freezer bag. Reheat in the oven or air fryer for best texture.
What’s the best way to ensure they’re crispy?
Use a wire rack on your baking sheet and spray with oil to help the coating crisp up evenly.
Can I use chicken tenders instead?
Yes, just reduce the cooking time by about 5 minutes since tenders are smaller.
Do I have to flip the cutlets while baking?
Flipping ensures even browning on both sides, so it’s recommended.
Can I make this dairy-free?
Skip the Parmesan or use a dairy-free alternative cheese.
What sides go well with baked chicken cutlets?
Try mashed potatoes, roasted vegetables, pasta, or a fresh green salad.
Can I use a different protein?
Yes, this method works well with thin pork chops or turkey cutlets too.
Should I marinate the chicken first?
It’s not necessary, but you can soak in buttermilk or a light brine for extra tenderness.
How do I know when the chicken is done?
Use a meat thermometer—once the internal temp hits 165°F (74°C), it’s ready.
Conclusion
Baked Chicken Cutlets are a quick, healthy, and delicious option that doesn’t compromise on flavor or texture. Whether you’re serving them with a hearty side or slicing them into a salad or sandwich, these cutlets are sure to be a hit. Simple to prepare, easy to customize, and perfect for busy nights, this is a recipe you’ll come back to again and again.
PrintBaked Chicken Cutlets

These Baked Chicken Cutlets are crispy on the outside, juicy on the inside, and made with simple ingredients. They’re oven-baked instead of fried, making them a healthier option without sacrificing flavor. Perfect for sandwiches, salads, or served with your favorite sides!
- Prep Time: 15 minutes
- Cook Time: 25 minutes
- Total Time: 40 minutes
- Yield: 4 servings 1x
- Category: Main Dish
- Method: Baking
- Cuisine: American
Ingredients
-
4 boneless, skinless chicken breasts (pounded to 1/2-inch thick)
-
1 cup all-purpose flour
-
2 large eggs
-
1 tbsp water
-
1 1/2 cups breadcrumbs (plain or Italian-style)
-
1/2 cup grated Parmesan cheese
-
1 tsp garlic powder
-
1 tsp onion powder
-
1 tsp dried Italian seasoning
-
1/2 tsp salt
-
1/2 tsp black pepper
-
Cooking spray or olive oil spray
Instructions
-
Preheat your oven to 400°F (200°C). Line a baking sheet with parchment paper or foil and lightly coat with cooking spray.
-
Set up a breading station with three shallow dishes: one with flour, one with beaten eggs and water, and one with breadcrumbs, Parmesan, and seasonings.
-
Dredge each chicken cutlet in flour, then dip into the egg mixture, and finally coat with the breadcrumb mixture. Press breadcrumbs onto the chicken to make sure they stick.
-
Place the breaded chicken cutlets on the prepared baking sheet. Lightly spray the tops with cooking spray.
-
Bake for 20–25 minutes, flipping once halfway through, until golden brown and the internal temperature reaches 165°F (74°C).
-
Let rest for 5 minutes before serving.
Notes
-
Use panko breadcrumbs for extra crunch.
-
Add a pinch of paprika or chili flakes for a spicy kick.
-
Great for freezing! Bake and cool, then freeze in a single layer before storing in a freezer bag.