
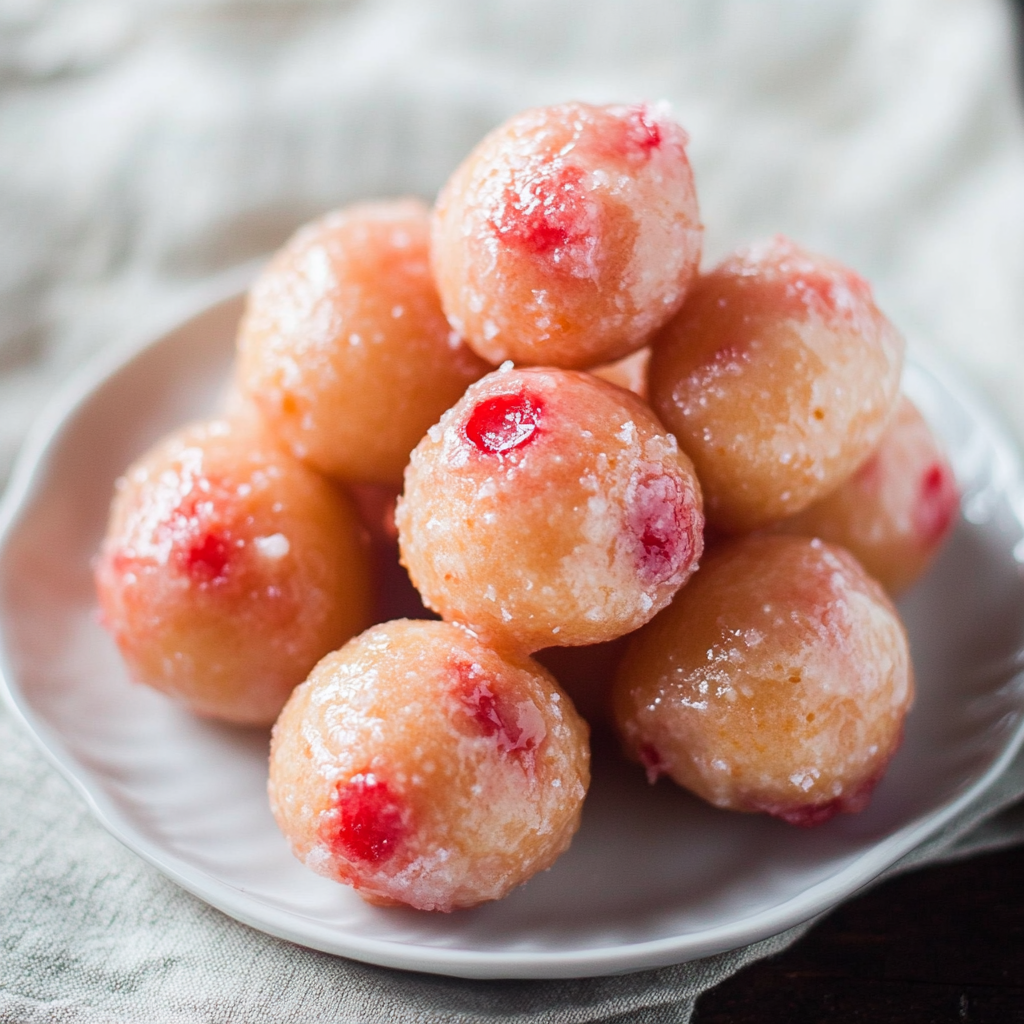
If you’re craving a delicious, easy-to-make treat that will delight your family and guests, look no further than Cherry Doughnut Holes! These bite-sized delights are the perfect combination of fluffy dough, a hint of cherry flavor, and a sweet coating that will leave you coming back for more. Whether you’re preparing for a weekend brunch or looking to impress at a party, these Cherry Doughnut Holes are sure to be a hit.
Ingredients You’ll Need
- For the Doughnut Holes:
- 1 1/2 cups all-purpose flour
- 1/2 cup sugar
- 2 teaspoons baking powder
- 1/4 teaspoon salt
- 1/2 teaspoon ground cinnamon
- 1/4 teaspoon ground nutmeg
- 2 large eggs
- 1/2 cup milk
- 2 tablespoons unsalted butter, melted
- 1 teaspoon vanilla extract
- 1/2 cup chopped cherries (fresh or frozen)
- For the Coating:
- 1/4 cup melted butter
- 1/2 cup powdered sugar
- 1/2 teaspoon vanilla extract
How to Make Cherry Doughnut Holes
Step 1: Prepare the Doughnut Dough Start by preheating your oil to 350°F (175°C) in a deep fryer or heavy-bottomed pot. In a large mixing bowl, whisk together the flour, sugar, baking powder, salt, cinnamon, and nutmeg. These dry ingredients create a flavorful base for the doughnut holes.
In another bowl, beat the eggs and then add the milk, melted butter, and vanilla extract. Mix well to combine. Gradually add the wet ingredients to the dry ingredients, stirring until the dough comes together. Once combined, fold in the chopped cherries, ensuring they’re evenly distributed throughout the dough.
Step 2: Fry the Doughnut Holes Using a spoon or small cookie scoop, drop spoonfuls of dough into the hot oil. Be sure not to overcrowd the pot to allow the doughnut holes to cook evenly. Fry for about 2-3 minutes, or until golden brown on all sides. Remove from the oil and place on a paper towel-lined plate to drain any excess oil.
Step 3: Coat the Doughnut Holes While the doughnut holes are cooling slightly, prepare the coating. In a small bowl, melt the butter and stir in the vanilla extract. In a separate bowl, place the powdered sugar. Once the doughnut holes are cool enough to handle, dip them first in the melted butter, ensuring they’re fully coated. Then, roll each doughnut hole in the powdered sugar to give it a sweet, irresistible finish.
Step 4: Serve and Enjoy Serve your Cherry Doughnut Holes warm for the best experience. They’re perfect as a sweet snack, a party treat, or even as a fun addition to breakfast. Pair them with a cup of coffee, tea, or a glass of milk for the ultimate indulgence.
Tips for the Perfect Cherry Doughnut Holes
- Fresh or Frozen Cherries: Both fresh and frozen cherries work great in this recipe. If using frozen cherries, make sure to thaw and drain them before adding them to the dough to prevent excess moisture.
- Avoid Overcrowding the Pot: Fry the doughnut holes in batches to ensure they cook evenly and don’t stick together.
- Make it a Flavor Twist: Try adding a little almond extract or citrus zest to the dough for a unique flavor combination.
- Store Leftovers: If you have any leftovers, store them in an airtight container for up to two days. They can also be frozen for up to one month. Reheat in the oven for a few minutes to restore their warmth and freshness.
Why You’ll Love Cherry Doughnut Holes
Cherry Doughnut Holes offer a delightful balance of sweet and fruity flavors. The softness of the dough combined with the burst of juicy cherries makes each bite a real treat. Plus, they’re quick and easy to prepare, making them an ideal option for those busy days when you want something homemade but without a lot of fuss.
Whether you’re making them for a family breakfast, a party, or just as a fun dessert, these Cherry Doughnut Holes are sure to become a favorite in your recipe rotation. Try them today and experience the sweet, comforting goodness of homemade doughnuts with a cherry twist!
Final Thoughts
Cherry Doughnut Holes are the perfect combination of simplicity and indulgence. With minimal ingredients and a straightforward process, you’ll have a batch of homemade doughnut holes ready in no time. Give this recipe a try and treat yourself and your loved ones to a batch of these irresistible cherry-flavored delights!
Serving and Storage Tips for Cherry Doughnut Holes
Serving Tips:
- Serve Warm: For the best experience, serve the Cherry Doughnut Holes warm. The soft, fluffy texture and sweet cherry flavor are most enjoyable when freshly made. If you’re making them in advance, simply reheat them in the oven for a few minutes to restore their warmth.
- Pair with Beverages: These doughnut holes pair perfectly with coffee, tea, or milk. Their sweetness complements a hot drink, making them ideal for breakfast, brunch, or an afternoon snack.
- Add a Fun Twist: For extra flavor, dust the doughnut holes with cinnamon sugar or drizzle them with a chocolate glaze. You can also serve them with a side of whipped cream or a fruit dip for a unique touch.
- Perfect for Parties: Serve them in small bowls or on a tray for easy sharing. Their bite-sized nature makes them a great addition to any party or gathering. They’re also a fun treat for kids!
Storage Tips:
- Room Temperature: If you have leftover Cherry Doughnut Holes, store them in an airtight container at room temperature. They will stay fresh for about 1-2 days. However, keep in mind that the sugar coating may soften over time.
- Freezing Leftovers: To store doughnut holes for a longer period, freeze them! Place the doughnut holes in a single layer on a baking sheet and freeze until solid. Then, transfer them to a freezer-safe bag or container. They can be stored in the freezer for up to 1 month. When ready to enjoy, reheat them in the oven at 350°F (175°C) for 5-10 minutes.
- Reheating Tips: For the best results when reheating, use the oven instead of the microwave. Preheat the oven to 350°F (175°C), place the doughnut holes on a baking sheet, and heat them for about 5-10 minutes, or until warmed through. This helps maintain their crispiness and texture.
By following these serving and storage tips, you can ensure that your Cherry Doughnut Holes stay fresh and delicious, whether you’re serving them right away or saving some for later!
1. Can I use frozen cherries in this recipe? Yes, you can absolutely use frozen cherries for Cherry Doughnut Holes. Just make sure to thaw them first and drain any excess moisture to avoid altering the dough’s consistency. Frozen cherries work just as well as fresh ones!
2. How do I prevent the doughnut holes from absorbing too much oil while frying? To prevent the doughnut holes from absorbing too much oil, make sure the oil is hot enough (around 350°F or 175°C) before frying. Use a thermometer to check the temperature, and fry the doughnut holes in small batches to avoid overcrowding. This ensures even cooking and a crisp outer layer.
3. Can I make Cherry Doughnut Holes ahead of time? Yes, you can prepare the doughnut holes ahead of time! Fry and store them in an airtight container for up to 2 days at room temperature. If you want to keep them longer, you can freeze them for up to 1 month and reheat them in the oven when ready to serve.
4. Can I customize the flavor of the doughnut holes? Definitely! While this recipe features cherries, you can easily customize it by swapping out the fruit for other berries, such as blueberries or raspberries. You can also add spices like almond extract or citrus zest to the dough for a unique twist.
PrintCherry Doughnut Holes
Cherry doughnut holes are a fun, bite-sized treat with a tender, sweet dough filled or flavored with cherries. Coated in a sugary glaze or dusted with powdered sugar, they’re perfect for breakfast, dessert, or a delightful snack any time of the day.
- Prep Time: 20 minutes
- Cook Time: 15 minutes
- Total Time: 35 minutes
- Yield: About 24 doughnut holes 1x
- Category: Dessert, Breakfast
- Method: Fried
- Cuisine: American
Ingredients
For the doughnut holes:
- 2 cups (250 g) all-purpose flour
- 2 teaspoons baking powder
- 1/2 teaspoon salt
- 1/3 cup (65 g) granulated sugar
- 1 large egg
- 3/4 cup (180 ml) milk
- 1 teaspoon vanilla extract
- 2 tablespoons unsalted butter, melted
- 1/2 cup (100 g) chopped maraschino cherries or cherry pie filling
For frying:
- Vegetable oil, for frying
For the glaze:
- 1 cup (120 g) powdered sugar
- 2–3 tablespoons milk
- 1/2 teaspoon almond or vanilla extract (optional)
Optional garnish:
- Extra chopped cherries or sprinkles
Instructions
- Heat the oil:
- Heat about 2 inches of vegetable oil in a deep saucepan or fryer to 350°F (175°C).
- Prepare the dough:
- In a large mixing bowl, whisk together the flour, baking powder, salt, and sugar.
- In a separate bowl, whisk the egg, milk, vanilla extract, and melted butter. Add the wet ingredients to the dry ingredients and stir until just combined. Fold in the chopped cherries.
- Fry the doughnut holes:
- Using a small cookie scoop or a spoon, carefully drop tablespoon-sized portions of dough into the hot oil. Fry in batches to avoid overcrowding. Cook for 2–3 minutes, turning occasionally, until golden brown.
- Remove with a slotted spoon and drain on a paper towel-lined plate.
- Make the glaze:
- In a small bowl, whisk together the powdered sugar, milk, and almond or vanilla extract until smooth.
- Coat the doughnut holes:
- While still warm, dip the doughnut holes into the glaze, turning to coat. Place them on a wire rack to allow excess glaze to drip off.
- Serve:
- Let the glaze set for a few minutes, then serve. Garnish with extra chopped cherries or sprinkles if desired.
Notes
- For a simpler option, dust the doughnut holes with powdered sugar or cinnamon sugar instead of glazing.
- Substitute maraschino cherries with dried cherries for a more natural flavor.
- These doughnut holes are best enjoyed fresh but can be stored in an airtight container for up to 2 days.