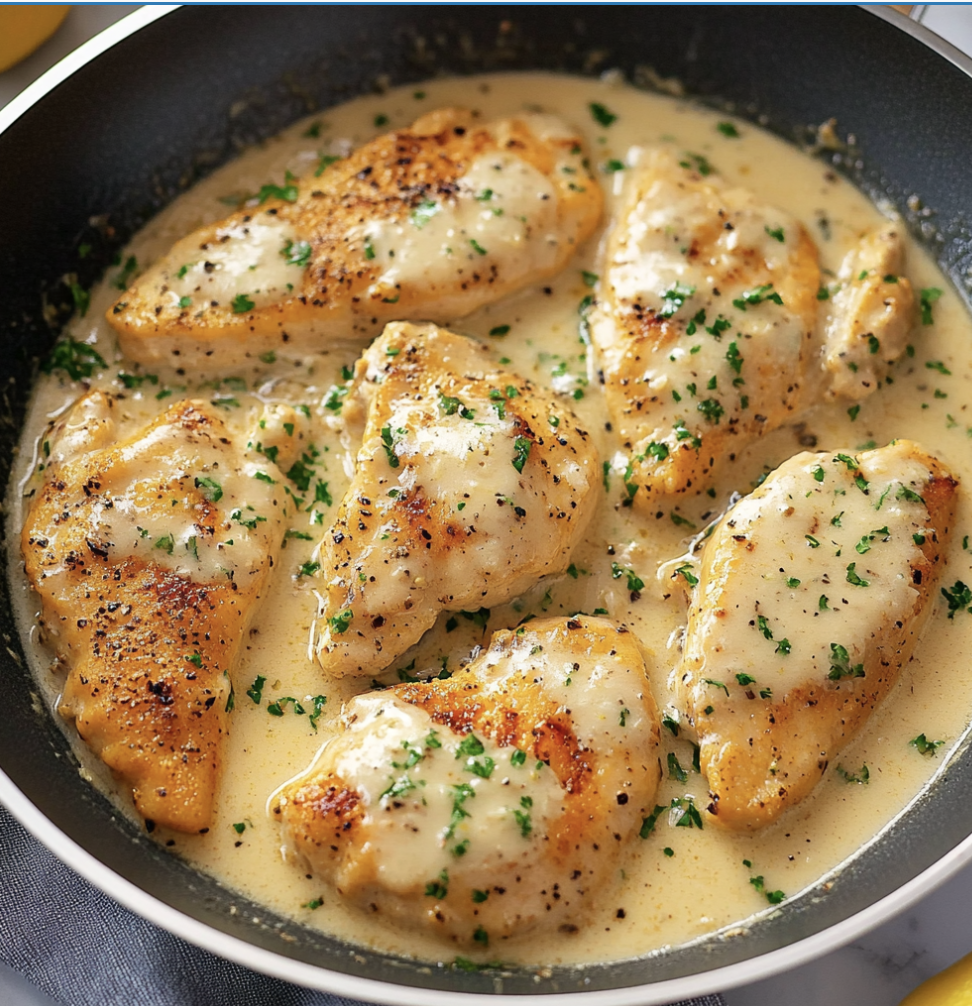
Looking for a simple yet delicious chicken recipe that combines the irresistible flavors of garlic and Parmesan? This Garlic Parmesan Chicken is a crowd-pleaser, perfect for weeknight dinners or special occasions. With crispy golden edges and a juicy center, this dish is bound to become a family favorite. Let’s dive into the details of this savory recipe.
Why You’ll Love Garlic Parmesan Chicken
- Quick and Easy: Ready in under 30 minutes, making it ideal for busy days.
- Versatile: Pairs well with pasta, rice, or a fresh salad.
- Crowd Favorite: Combines classic flavors that everyone loves.
Ingredients
For the Chicken:
- 4 boneless, skinless chicken breasts
- 1/2 cup grated Parmesan cheese
- 1 cup breadcrumbs (Panko recommended for extra crispiness)
- 1 teaspoon garlic powder
- 1/2 teaspoon paprika
- Salt and black pepper to taste
For the Garlic Butter Sauce:
- 3 tablespoons unsalted butter
- 3 garlic cloves, minced
- 2 tablespoons chopped parsley (optional for garnish)
Step-by-Step Instructions

Step 1: Prepare the Coating
- Preheat your oven to 375°F (190°C) and line a baking sheet with parchment paper or lightly grease it.
- In a shallow dish, mix together breadcrumbs, Parmesan cheese, garlic powder, paprika, salt, and pepper.
Step 2: Coat the Chicken
- Pat the chicken breasts dry with paper towels.
- Dip each chicken breast into the breadcrumb mixture, ensuring an even coating. Gently press to adhere the mixture.
Step 3: Bake the Chicken
- Arrange the coated chicken breasts on the prepared baking sheet.
- Bake in the preheated oven for 20-25 minutes or until the internal temperature reaches 165°F (74°C) and the coating is golden brown.
Step 4: Prepare the Garlic Butter Sauce
- While the chicken is baking, melt the butter in a small saucepan over medium heat.
- Add the minced garlic and sauté for 1-2 minutes until fragrant.
- Remove from heat and stir in chopped parsley, if using.
Step 5: Serve
- Drizzle the garlic butter sauce over the baked chicken before serving.
- Garnish with extra Parmesan and parsley for added flavor and presentation.
Serving Suggestions
- Pair this Garlic Parmesan Chicken with creamy mashed potatoes, steamed vegetables, or a side of buttery pasta for a complete meal.
- For a lighter option, serve with a fresh garden salad or roasted vegetables.
Tips for Success
- Use Fresh Garlic: For the sauce, fresh garlic enhances the overall flavor profile compared to pre-minced alternatives.
- Pound Chicken Evenly: For even cooking, pound the chicken breasts to a uniform thickness.
- Air Fryer Option: For an even crispier result, cook the chicken in an air fryer at 375°F for 15 minutes.
Nutritional Information (Per Serving)
- Calories: 320
- Protein: 35g
- Carbohydrates: 15g
- Fat: 12g
Note: Nutritional values are estimates and may vary based on portion size and ingredients used.
Conclusion
This Garlic Parmesan Chicken recipe combines the comfort of home cooking with rich, restaurant-quality flavors. Whether you’re preparing it for your family or entertaining guests, this dish is sure to impress. Try it today and enjoy the delightful harmony of crispy, cheesy, and garlicky goodness!
Serving and Storage Tips for Garlic Parmesan Chicken
Serving Tips:
- Pair with Side Dishes:
This Garlic Parmesan Chicken pairs wonderfully with a variety of sides. Consider serving it with:- Pasta: A creamy Alfredo or a light lemon butter pasta would complement the richness of the chicken.
- Vegetables: Roasted or steamed vegetables like broccoli, green beans, or asparagus add freshness and balance to the meal.
- Salads: A crisp green salad with a tangy vinaigrette will cut through the richness of the chicken.
- Bread: Serve with crusty bread or garlic bread to soak up any leftover garlic butter sauce.
- Garnish for Extra Flavor:
- Add an extra sprinkle of freshly grated Parmesan over the chicken right before serving for an added cheesy kick.
- A sprinkle of fresh parsley adds color and freshness, brightening up the dish.
- Make it a Meal:
Turn this recipe into a complete meal by serving it alongside:- Rice: A simple, fluffy rice or a seasoned risotto would pair beautifully.
- Mashed Potatoes: The creamy, buttery mashed potatoes complement the crispy chicken for a comforting meal.
Storage Tips:
- Refrigerating Leftovers:
- Cool Before Storing: Let the chicken cool down to room temperature before storing it to avoid condensation that can make the chicken soggy.
- Store in Airtight Containers: Place the leftover chicken in an airtight container to maintain its freshness. Properly stored, it will last in the refrigerator for up to 3-4 days.
- Freezing Garlic Parmesan Chicken:
- Freeze for Later: If you want to store the chicken for a longer period, you can freeze it. To do so, wrap the chicken tightly in plastic wrap or aluminum foil, and place it in a freezer-safe bag or container.
- Frozen Storage: The chicken will keep for 2-3 months in the freezer.
- Reheat: To reheat, thaw in the refrigerator overnight and then bake or reheat in the microwave. If reheating from frozen, bake at 350°F (175°C) for 20-25 minutes or until heated through.
- Reheating Tips:
- Oven Reheating: For the best results, reheat the chicken in the oven at 350°F (175°C) for about 10-15 minutes to retain its crispy texture.
- Microwave Reheating: If you’re short on time, the microwave will work, though it may cause the coating to lose some of its crispiness. Be sure to cover the chicken with a damp paper towel to prevent it from drying out.
Serving and Storage Summary:
- Serve with sides like pasta, vegetables, or a fresh salad for a well-rounded meal.
- Store leftovers in an airtight container in the fridge for up to 3-4 days or freeze for up to 2-3 months.
- Reheat in the oven to preserve the crispy coating or use the microwave for quicker results.
By following these simple serving and storage tips, you can enjoy your Garlic Parmesan Chicken on multiple occasions without sacrificing flavor or texture!
1. Can I make Garlic Parmesan Chicken ahead of time?
Yes! You can prepare the chicken ahead of time by coating it in the breadcrumb mixture and storing it in the fridge for up to 24 hours before baking. When ready to cook, simply bake it as directed. If you want to make the garlic butter sauce ahead of time, you can store it in an airtight container in the fridge and reheat it when ready to serve.
2. Can I use bone-in chicken instead of boneless?
Yes, you can use bone-in chicken pieces, but be aware that bone-in cuts may take longer to cook. You’ll need to adjust the cooking time, typically around 35-45 minutes, depending on the size of the chicken pieces. Ensure the internal temperature reaches 165°F (74°C) for proper doneness.
3. Can I make this recipe gluten-free?
Absolutely! To make a gluten-free version, substitute the regular breadcrumbs with gluten-free breadcrumbs or crushed gluten-free crackers. Make sure that all the ingredients, including the Parmesan cheese, are certified gluten-free.
4. Can I make Garlic Parmesan Chicken in an air fryer?
Yes, the air fryer is a great way to make Garlic Parmesan Chicken. Preheat the air fryer to 375°F (190°C) and cook the chicken for about 15-20 minutes, flipping halfway through, until the chicken reaches an internal temperature of 165°F (74°
Garlic Parmesan Chicken
This Garlic Parmesan Chicken is a flavorful, crispy, and cheesy dish that’s simple to prepare and perfect for dinner. Juicy chicken breasts or thighs are coated in a garlic-infused Parmesan crust and baked or pan-fried to golden perfection.
- Prep Time: 15 minutes
- Cook Time: 25 minutes
- Total Time: 40 minutes
- Yield: 4 servings 1x
- Category: Main Course
- Method: Pan-Fried or Baked
- Cuisine: American
Ingredients
For the Chicken
- 4 boneless, skinless chicken breasts (or thighs)
- 1/2 cup grated Parmesan cheese
- 1/2 cup breadcrumbs (Panko for extra crunch)
- 2 tsp garlic powder
- 1 tsp Italian seasoning
- 1/2 tsp paprika
- 1/2 tsp salt
- 1/4 tsp black pepper
For the Coating
- 2 eggs, beaten
- 1/4 cup all-purpose flour
For Cooking
- 2–3 tbsp olive oil (for pan-frying) or cooking spray (for baking)
Optional Garnish
- Fresh parsley, chopped
- Additional grated Parmesan
Instructions
1. Prepare the Chicken
- Preheat your oven to 400°F (200°C) if baking.
- Pound the chicken to an even thickness using a meat mallet for even cooking.
2. Set Up the Coating Station
- Place the flour in a shallow dish.
- Beat the eggs in another shallow dish.
- In a third dish, combine the Parmesan cheese, breadcrumbs, garlic powder, Italian seasoning, paprika, salt, and black pepper.
3. Coat the Chicken
- Dredge each chicken piece in the flour, shaking off the excess.
- Dip it into the beaten eggs, ensuring it’s fully coated.
- Press the chicken into the Parmesan breadcrumb mixture, ensuring even coverage.
4. Cook the Chicken
For Pan-Frying:
- Heat olive oil in a large skillet over medium heat.
- Add the coated chicken and cook for 4–5 minutes per side, until golden brown and the internal temperature reaches 165°F (75°C).
For Baking:
- Place the coated chicken on a baking sheet lined with parchment paper. Spray the tops lightly with cooking spray for a crispier crust.
- Bake for 20–25 minutes, flipping halfway through, until golden brown and fully cooked.
5. Serve
- Transfer the chicken to a serving plate and garnish with fresh parsley and additional Parmesan if desired.
- Serve hot with a side of pasta, salad, or roasted vegetables.
Notes
- Air Fryer Option: Cook the coated chicken in an air fryer at 375°F (190°C) for 10–12 minutes, flipping halfway through.
- Customizations: Add a pinch of red pepper flakes to the breadcrumb mixture for a spicy kick.
- Storage: Store leftovers in an airtight container in the refrigerator for up to 3 days. Reheat in the oven or air fryer to maintain crispiness.


