
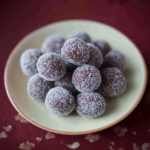
Grandma’s Rum Balls are a classic no-bake treat, bursting with rich chocolate flavor and a warm kick of rum. Perfect for the holidays or any special occasion, these bite-sized delights are quick to make and always a hit. Rolled in powdered sugar, cocoa, or sprinkles, they’re as festive as they are delicious.
Why You’ll Love This Recipe
- No baking required, making them quick and easy to prepare.
- Packed with rich chocolate and the subtle warmth of rum.
- Perfect for holiday gifting, parties, or an indulgent treat.
- Can be made in advance and stored for weeks.
- Versatile recipe with endless options for coatings and flavors.
Ingredients
(Tip: You’ll find the full list of ingredients and measurements in the recipe card below.)
- Vanilla wafers, finely crushed
- Cocoa powder
- Powdered sugar
- Rum (dark or spiced)
- Corn syrup or honey
- Chopped nuts (such as walnuts or pecans)
- Optional coatings: powdered sugar, cocoa powder, sprinkles, or shredded coconut
Directions

- Prepare the Dry Mix: In a large bowl, combine the crushed vanilla wafers, cocoa powder, powdered sugar, and chopped nuts. Mix well.
- Add Wet Ingredients: Stir in the rum and corn syrup (or honey) until the mixture comes together and holds its shape when pressed.
- Form the Balls: Roll the mixture into 1-inch balls using your hands.
- Coat: Roll each ball in your desired coating, such as powdered sugar, cocoa powder, sprinkles, or shredded coconut.
- Chill: Place the rum balls in an airtight container and refrigerate for at least 2 hours before serving to allow the flavors to meld.
Servings and Timing
- Servings: Makes approximately 24 rum balls.
- Prep Time: 20 minutes
- Chill Time: 2 hours
- Total Time: 2 hours 20 minutes
Variations
- Boozy Alternative: Substitute rum with bourbon or spiced whiskey for a different flavor profile.
- Non-Alcoholic Version: Replace rum with rum extract or orange juice for a family-friendly option.
- Nut-Free Option: Omit the nuts and add extra crushed wafers or coconut for texture.
- Dark Chocolate Twist: Add melted dark chocolate to the mixture for an extra-rich flavor.
- Festive Coatings: Roll in crushed candy canes or holiday-themed sprinkles for a seasonal flair.
Storage/Reheating
- Storage: Store rum balls in an airtight container in the refrigerator for up to 2 weeks. The flavor improves over time!
- Freezing: Freeze in an airtight container for up to 3 months. Thaw in the refrigerator before serving.
FAQs
Do rum balls contain alcohol?
Yes, traditional rum balls contain alcohol, but you can make a non-alcoholic version with rum extract or juice.
Can I make these without nuts?
Yes, simply omit the nuts or replace them with additional crushed wafers or shredded coconut.
How do I crush the vanilla wafers?
You can use a food processor or place the wafers in a sealed bag and crush them with a rolling pin.
What’s the best type of rum to use?
Dark or spiced rum works best for a deep, flavorful taste, but any rum will do.
Can I use other cookies instead of vanilla wafers?
Yes, graham crackers, digestive biscuits, or chocolate cookies are great substitutes.
How long should rum balls chill before serving?
Allow at least 2 hours for the flavors to meld, but overnight is even better.
Can I add dried fruit to the mixture?
Yes, finely chopped dried fruits like raisins or dates can add a nice texture and sweetness.
Are these cookies kid-friendly?
Not if using alcohol, but the non-alcoholic version is suitable for kids.
What’s the best way to package rum balls for gifts?
Place them in decorative tins or festive cellophane bags for a thoughtful homemade gift.
Can I double the recipe?
Absolutely! This recipe scales well for larger batches.
Conclusion
Grandma’s Rum Balls are a timeless treat that brings warmth and nostalgia to any celebration. With their rich chocolate flavor and customizable coatings, they’re as fun to make as they are to eat. Whether you’re preparing them for a holiday party, gifting them to loved ones, or sneaking a few for yourself, these no-bake bites are sure to impress.
PrintGrandma’s Rum Balls
Grandma’s Rum Balls are rich, chocolatey, and infused with the warm flavor of rum. These no-bake treats are perfect for the holidays, gifting, or as a sweet, nostalgic indulgence.
- Prep Time: 20 minutes
- Cook Time: 1-2 hours
- Total Time: 1 hour 20 minutes
- Yield: About 24 rum balls 1x
- Category: Dessert, Holiday Treats
- Method: No-Bake
- Cuisine: American
Ingredients
- 2 cups (250 g) finely crushed vanilla wafer cookies (about 50 wafers)
- 1 cup (120 g) powdered sugar (plus extra for rolling)
- 1/4 cup (20 g) unsweetened cocoa powder
- 1 cup (120 g) finely chopped pecans or walnuts
- 1/4 cup (60 ml) dark or spiced rum
- 3 tbsp (45 ml) light corn syrup or honey
Instructions
1. Mix the Dry Ingredients:
- In a large bowl, combine the crushed vanilla wafers, powdered sugar, cocoa powder, and chopped nuts. Mix until well blended.
2. Add the Wet Ingredients:
- Stir in the rum and corn syrup (or honey). Mix until the mixture comes together into a sticky dough.
3. Shape the Balls:
- Using your hands or a small scoop, roll the dough into 1-inch balls.
4. Coat the Rum Balls:
- Roll each ball in powdered sugar to coat. For a festive touch, you can also roll them in sprinkles or finely chopped nuts.
5. Let Them Set:
- Place the rum balls on a parchment-lined tray and let them sit at room temperature for 1-2 hours to firm up.
6. Serve or Store:
- Store the rum balls in an airtight container in the refrigerator for up to 2 weeks. The flavor intensifies over time!
Notes
- For non-alcoholic rum balls, replace the rum with rum extract (about 1 tsp) and add 2-3 tbsp of orange juice or water to achieve the right consistency.
- If the dough is too dry, add a splash of rum or water; if too wet, mix in more crushed wafers.
- These can be frozen for up to 3 months. Thaw in the fridge before serving.