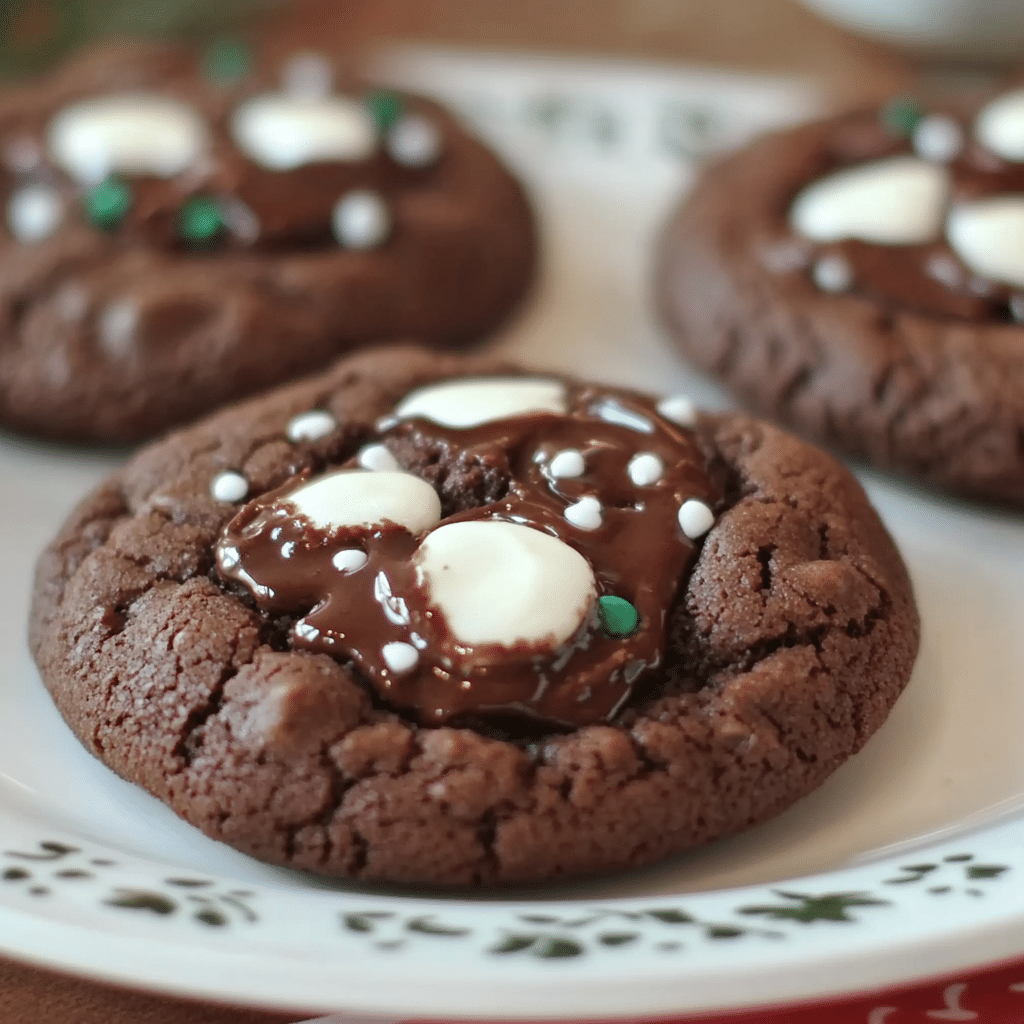
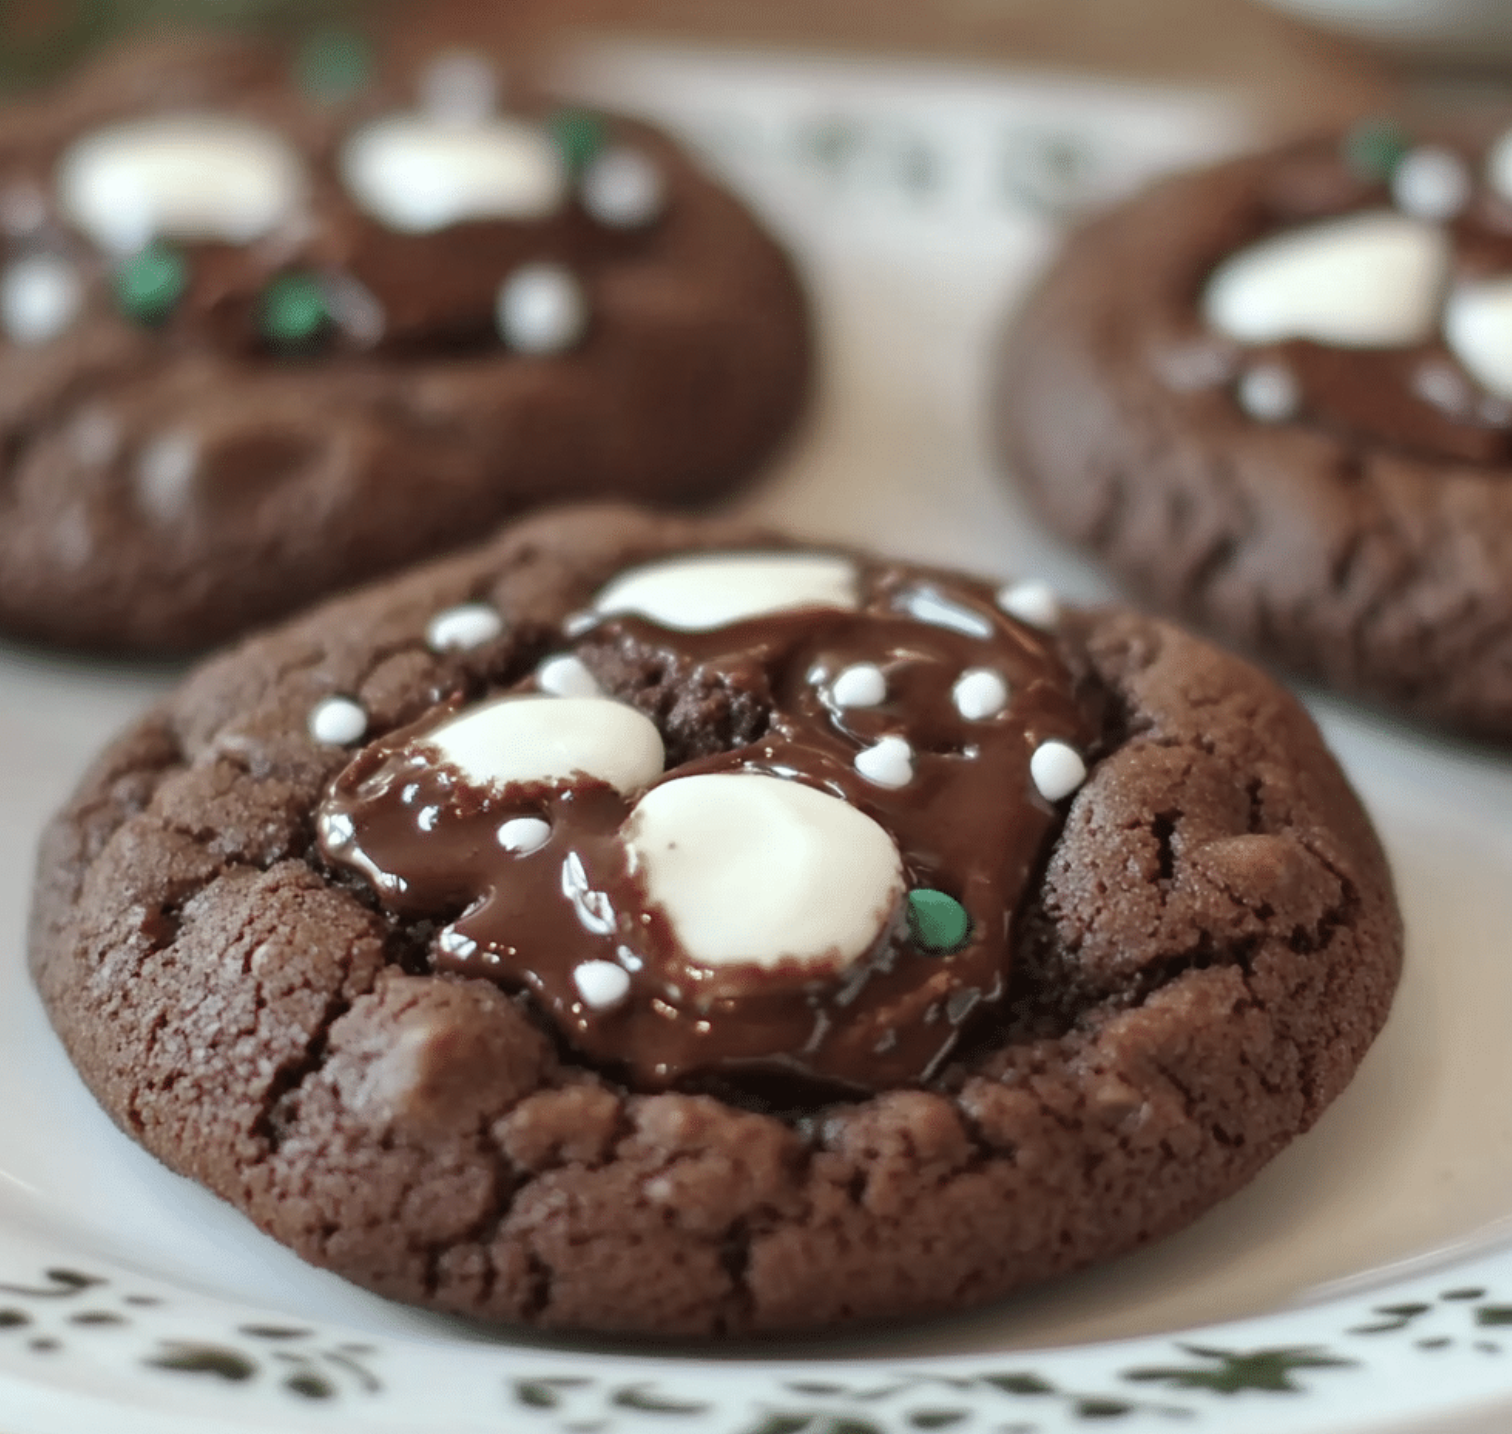
Looking for the perfect winter treat? Hot Cocoa Cookies are the ideal way to indulge in the rich, comforting flavors of hot chocolate, but in cookie form. These cookies are soft, chewy, and packed with cocoa flavor, making them the perfect dessert for cold days, holiday gatherings, or simply as a sweet snack.
Why You’ll Love Hot Cocoa Cookies:
- Cozy & Comforting: Just like a cup of hot cocoa, these cookies provide warmth and comfort with every bite. The deep chocolate flavor, combined with the soft texture, will make you feel cozy inside.
- Easy to Make: This recipe is simple and straightforward, requiring ingredients you likely already have in your pantry. Perfect for beginners and seasoned bakers alike.
- Perfect for Any Occasion: Whether you’re celebrating the holidays or just craving something sweet, Hot Cocoa Cookies are a delightful treat. They’re great for cookie exchanges, gift-giving, or serving at parties.
- Kids Will Love Them: If you have little ones in the house, they’ll enjoy helping out with these cookies. Rolling the dough into balls, adding marshmallows, and watching them bake are fun activities for the whole family.
Ingredients for Hot Cocoa Cookies:
- 1 cup (2 sticks) unsalted butter, softened
- 1 cup granulated sugar
- 1 cup packed brown sugar
- 2 large eggs
- 2 teaspoons vanilla extract
- 2 ½ cups all-purpose flour
- 1/2 cup unsweetened cocoa powder
- 1 teaspoon baking soda
- ½ teaspoon salt
- 1 cup mini marshmallows
- 1 cup chocolate chips (milk or semi-sweet)
- Optional: ¼ cup hot cocoa mix (for extra flavor!)
How to Make Hot Cocoa Cookies:

- Preheat the Oven: Preheat your oven to 350°F (175°C) and line two baking sheets with parchment paper or silicone mats to prevent sticking.
- Cream the Butter and Sugars: In a large bowl, beat the softened butter with the granulated sugar and brown sugar until light and fluffy. This step is key to achieving that soft, chewy cookie texture.
- Add the Eggs and Vanilla: Beat in the eggs one at a time, followed by the vanilla extract. Make sure everything is well-combined.
- Mix the Dry Ingredients: In a separate bowl, whisk together the flour, cocoa powder, baking soda, and salt. Gradually add this dry mixture to the wet ingredients, mixing until just combined. If you’re using hot cocoa mix, add it in at this stage for an extra burst of chocolate flavor.
- Add the Marshmallows and Chocolate Chips: Gently fold in the mini marshmallows and chocolate chips. This will give the cookies their iconic gooey and chocolatey texture.
- Shape the Cookies: Use a tablespoon or a cookie scoop to portion out the dough. Roll the dough into balls and place them about 2 inches apart on the prepared baking sheets. This allows room for the cookies to spread as they bake.
- Bake: Bake for 10-12 minutes, or until the edges are set but the centers are still soft. Don’t worry if the cookies appear slightly underbaked in the middle; they will continue to firm up as they cool.
- Cool & Enjoy: Allow the cookies to cool on the baking sheet for 5 minutes before transferring them to a wire rack to cool completely. The marshmallows will be soft and gooey, adding a deliciously chewy texture to each bite.
Tips for Perfect Hot Cocoa Cookies:
- Use Good Quality Cocoa Powder: The cocoa powder is the star ingredient, so using a high-quality unsweetened cocoa powder will make a big difference in flavor.
- Don’t Overbake: For chewy cookies, be sure not to overbake. Pull them out when the edges are firm but the centers remain slightly soft.
- Add Mini Chocolate Chips for Extra Decadence: If you’re a chocolate lover, feel free to add mini chocolate chips to the dough for an extra dose of chocolatey goodness.
How to Store Hot Cocoa Cookies:
- At Room Temperature: Store the cookies in an airtight container at room temperature for up to 1 week. They’ll stay soft and fresh for days!
- In the Freezer: You can freeze the dough for later use. Simply scoop the dough into balls and freeze them on a baking sheet. Once frozen, transfer the dough balls into a freezer-safe bag or container. When ready to bake, simply bake from frozen (add a few extra minutes to the bake time).
Conclusion:
Hot Cocoa Cookies are a must-try winter treat, combining the warmth of hot cocoa with the chewy texture of homemade cookies. Whether you’re enjoying them by the fire or gifting them to loved ones, these cookies are sure to bring joy to your holiday season. Easy to make and irresistibly delicious, they’re perfect for any occasion that calls for a little sweetness.
Serving and Storage Tips for Hot Cocoa Cookies
Serving Tips:
- Pair with Hot Cocoa: For the ultimate indulgence, serve your Hot Cocoa Cookies with a warm cup of hot cocoa. The chocolatey goodness of both treats complements each other perfectly, creating a cozy, comforting experience.
- Garnish with Extra Marshmallows: Top each cookie with a mini marshmallow or two before serving. It adds an extra touch of fun and makes the cookies even more reminiscent of a hot cocoa experience.
- Serve at Room Temperature: For the best texture and flavor, serve the cookies at room temperature. This allows the chocolate chips and marshmallows to maintain their soft, gooey consistency.
- Add a Dusting of Powdered Sugar: Lightly dust the cookies with powdered sugar right before serving for a festive, snow-like appearance that’s perfect for holiday gatherings.
- Ideal for Cookie Parties or Gifting: These cookies make excellent treats for holiday cookie exchanges or as a homemade gift. Arrange them in a cute tin or box to add a personal touch when giving them to friends or family.
Storage Tips:
- Airtight Container: Store your Hot Cocoa Cookies in an airtight container to keep them soft and fresh for up to 1 week at room temperature. The airtight seal helps maintain their chewy texture and prevents them from drying out.
- Layering with Parchment Paper: If you’re stacking the cookies in the container, place a layer of parchment paper between each layer to prevent them from sticking together.
- Freezing the Cookies: Hot Cocoa Cookies freeze wonderfully. To freeze, place the cookies in a single layer on a baking sheet and freeze until firm. Once frozen, transfer them to a freezer-safe bag or container. They can be stored in the freezer for up to 3 months. When ready to enjoy, let them thaw at room temperature or warm them up in the microwave for a few seconds.
- Freezing the Dough: If you’d like to prepare the dough in advance, scoop the dough into balls and freeze them on a baking sheet. Once frozen, transfer them to a freezer-safe bag. When you’re ready to bake, simply bake the dough balls directly from the freezer, adding a few extra minutes to the baking time.
- Avoid Storing in the Fridge: Refrigerating cookies can sometimes cause them to dry out, so it’s best to store them at room temperature or freeze them if you’re not eating them right away.
By following these serving and storage tips, you’ll ensure that your Hot Cocoa Cookies stay fresh, delicious, and ready to enjoy whenever the craving strikes!
- Can I use regular cocoa powder instead of unsweetened cocoa powder? For the best flavor and texture, it’s recommended to use unsweetened cocoa powder, as it provides the deep chocolate taste that’s essential for Hot Cocoa Cookies. Regular cocoa powder, such as sweetened cocoa, may alter the balance of sweetness in the recipe. If you must use sweetened cocoa powder, reduce the amount of sugar in the recipe to maintain the right level of sweetness.
- Can I substitute marshmallows with something else? Yes, if you’re not a fan of marshmallows or want to try something different, you can substitute mini marshmallows with white chocolate chips, chopped chocolate bars, or crushed graham crackers. These alternatives will still give the cookies a delicious texture and flavor, though the signature gooey marshmallow effect will be different.
- Can I add nuts or other mix-ins to the dough? Absolutely! Hot Cocoa Cookies are versatile, and you can add your favorite mix-ins such as chopped walnuts, pecans, or even crushed candy canes for a festive touch. Just make sure to fold the additional ingredients gently into the dough so they distribute evenly.
- How can I make Hot Cocoa Cookies gluten-free? To make this recipe gluten-free, simply substitute the all-purpose flour with a gluten-free flour blend. Be sure to use one that’s designed for baking to ensure the best texture and flavor. You might also want to add a bit of xanthan gum (follow the instructions on the flour package) to help the cookies hold together.
Hot Cocoa Cookies
These Hot Cocoa Cookies are a delightful blend of chewy chocolate cookies topped with gooey marshmallows and melted chocolate, mimicking the comforting flavors of a cup of hot cocoa. They’re perfect for cozy winter nights or holiday gatherings!
- Prep Time: 15 minutes
- Chill Time: 1 hour
- Cook Time: 12 minutes
- Total Time: 1 hour 27 minutes
- Yield: 24 cookies 1x
- Category: Dessert
- Method: Baked
- Cuisine: American
Ingredients
For the cookies:
- 1 cup (225 g) unsalted butter, softened
- 1 cup (200 g) granulated sugar
- 1/2 cup (100 g) brown sugar, packed
- 2 large eggs
- 1 teaspoon vanilla extract
- 2 1/4 cups (280 g) all-purpose flour
- 1/2 cup (40 g) unsweetened cocoa powder
- 1 teaspoon baking soda
- 1/2 teaspoon salt
- 1 cup (180 g) chocolate chips
For the topping:
- 12 large marshmallows, cut in half (or 1 cup mini marshmallows)
- 1/2 cup (90 g) milk chocolate chips, melted
Instructions
1. Prepare the cookie dough
- In a large mixing bowl, cream together the softened butter, granulated sugar, and brown sugar until light and fluffy (2–3 minutes).
- Beat in the eggs, one at a time, then mix in the vanilla extract.
- In a separate bowl, whisk together the flour, cocoa powder, baking soda, and salt. Gradually add the dry ingredients to the wet ingredients, mixing just until combined.
- Fold in the chocolate chips.
2. Chill the dough
- Cover the bowl with plastic wrap and refrigerate for at least 1 hour to allow the dough to firm up.
3. Preheat the oven
- Preheat your oven to 350°F (175°C). Line two baking sheets with parchment paper or silicone baking mats.
4. Shape and bake the cookies
- Scoop tablespoon-sized portions of dough and roll them into balls.
- Place the dough balls on the prepared baking sheets, spacing them about 2 inches apart.
- Bake for 8–9 minutes, or until the cookies are set around the edges but still soft in the center.
5. Add the marshmallows
- Remove the cookies from the oven and quickly press a marshmallow half (cut-side down) into the center of each cookie.
- Return the cookies to the oven and bake for an additional 2 minutes, or until the marshmallows are puffed and slightly golden.
6. Finish with melted chocolate
- Drizzle the melted milk chocolate over the tops of the cookies.
- Let the cookies cool on the baking sheets for 5 minutes, then transfer them to a wire rack to cool completely.
Notes
- Storage: Store cookies in an airtight container at room temperature for up to 5 days.
- Freezing: Freeze unbaked dough balls for up to 3 months. Bake from frozen, adding an extra minute to the baking time.
- Toppings: Add a sprinkle of crushed peppermint or mini chocolate chips on top of the melted chocolate for a festive twist.


