
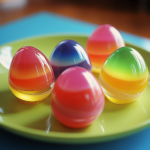
Jello Easter Eggs are a fun and colorful treat that adds a playful twist to your Easter celebrations. These wiggly, jiggly delights are not only delicious but also visually stunning, making them a perfect addition to your holiday table. Whether you enjoy them as a snack or use them as part of your Easter decor, these Jello eggs are sure to be a hit with kids and adults alike!
Why You’ll Love This Recipe
- Festive and Fun: These colorful eggs brighten up any Easter celebration.
- Simple Ingredients: All you need is Jello, water, and a mold to create these treats.
- Kid-Friendly: A great recipe to make with children—they’ll love helping out!
- Make-Ahead Convenience: These can be made ahead of time, saving you effort on the day of your event.
- Versatile: You can mix and match flavors and colors for a custom look.
Ingredients
- 6 ounces Jello (any flavor, or multiple flavors for a colorful variety)
- 2 1/2 cups boiling water
- Nonstick cooking spray
- Plastic Easter egg molds (or a Jello egg mold)
(Tip: You’ll find the full list of ingredients and measurements in the recipe card below.)
Directions

- Lightly coat the inside of each plastic egg mold with nonstick cooking spray. Wipe off excess with a paper towel.
- In a medium bowl, dissolve one package of Jello in 1 1/4 cups of boiling water. Stir until completely dissolved.
- Carefully pour the Jello mixture into the prepared egg molds, filling each one completely. If using plastic eggs, ensure they are securely closed.
- Place the filled molds in the refrigerator for at least 4 hours or until the Jello is fully set.
- Once set, gently open the molds and carefully remove the Jello eggs. If needed, run a little warm water over the outside of the mold to help release the Jello.
- Serve immediately or store in the refrigerator until ready to enjoy.
Servings and Timing
- Servings: Makes 12 Jello Easter eggs
- Prep Time: 15 minutes
- Chill Time: 4 hours
- Total Time: 4 hours 15 minutes
Variations
- Marbled Jello Eggs: Mix different colors of Jello in the molds for a marbled effect.
- Creamy Jello Eggs: Add a bit of sweetened condensed milk to create a creamy layer.
- Layered Jello Eggs: Let each color layer set before adding the next for a rainbow effect.
- Fruit-Filled Eggs: Add small fruit pieces like grapes or berries for added texture.
Storage/Reheating
- Storage: Keep Jello eggs in an airtight container in the refrigerator for up to 3 days.
- Avoid Reheating: Jello does not reheat well; it is best enjoyed chilled.
FAQs
How do I keep the Jello from sticking to the molds?
Using nonstick spray helps, but also ensure the molds are fully set before attempting to remove the Jello.
Can I use sugar-free Jello for this recipe?
Yes, sugar-free Jello works just as well and is a great option for those watching their sugar intake.
What if I don’t have plastic egg molds?
You can use a silicone mold or small cups instead. The shapes won’t be eggs, but they’ll still taste great!
How do I make layered Jello eggs?
Allow each layer to set completely before adding the next layer of Jello to the mold.
Can I add fruit or candy inside the Jello eggs?
Yes, small fruits like berries or candies like gummy worms can be added to the molds before pouring in the Jello.
Are Jello Easter eggs safe for young children?
Yes, but be cautious with very young children as the eggs can be slippery and pose a choking hazard.
Can I use natural fruit juice instead of Jello?
Yes, you can use fruit juice and unflavored gelatin for a more natural version of these treats.
What is the best way to remove Jello eggs from the mold?
Run warm water over the outside of the mold for a few seconds to help release the Jello.
Can I make these eggs in advance?
Yes, they can be made up to 3 days ahead and stored in the refrigerator.
Do I need to grease the molds if they are silicone?
While silicone molds are less likely to stick, a light spray of nonstick cooking spray is still recommended for easy release.
Conclusion
Jello Easter Eggs are a delightful and whimsical treat that adds a splash of color to your Easter festivities. Easy to make and endlessly customizable, these fun Jello eggs will capture the hearts of your guests. Whether you go for a rainbow of colors or a simple single-flavor batch, these eggs are sure to bring smiles all around. Get creative, have fun, and enjoy this wiggly, jiggly Easter treat!
PrintJello Easter Eggs
Jello Easter Eggs are a fun and colorful treat, perfect for adding a festive touch to your Easter celebrations. These gelatin-based eggs can be customized with various flavors and colors, making them a delightful addition to any Easter spread.
- Prep Time: 10 minutes
- Cook Time: 3 hours
- Total Time: 3 hours 10 minutes
- Yield: 12 Jello eggs 1x
- Category: Dessert
- Method: Refrigeration
- Cuisine: American
Ingredients
- 1 (6 oz.) package of JELL-O Gelatin, any flavor
- 1½ cups boiling water
- Cooking spray
Instructions
-
Prepare the Egg Molds:
-
If using a JELL-O Egg Mold, spray the insides of both halves and along the rims with cooking spray. Close the mold securely, ensuring each egg cavity is firmly sealed. Place the mold fill-side up on a tray.
-
If using plastic Easter eggs as molds, ensure there’s a hole large enough for filling on one end. Lightly coat the insides with cooking spray to facilitate easy removal.
-
-
Prepare the Gelatin Mixture:
- In a large bowl, add 1½ cups of boiling water to the gelatin powder. Stir for about 3 minutes until completely dissolved.
-
Fill the Molds:
- Using a measuring cup with a pour spout or a food-safe syringe, carefully pour the gelatin mixture into each egg mold through the fill-holes until each is filled just to the top of the egg shape.
-
Chill the Gelatin:
- Refrigerate the filled molds for at least 3 hours or until the gelatin is firm.
-
Unmold the Jello Eggs:
- To release the eggs, gently pry open the mold using a dull, flat knife between the halves of each egg. If using plastic Easter eggs, run each egg under warm water for a few seconds to loosen the gelatin before carefully opening the mold.
Notes
-
For a creative twist, consider making layered Jello eggs by adding different colored gelatin layers. Allow each layer to set slightly before adding the next.
-
If you don’t have specialized egg molds, you can create your own using cleaned eggshells or plastic Easter eggs. Ensure they are properly sanitized and prepared before use.
-
To prevent sticking, applying a thin layer of cooking spray inside the molds is recommended.